
# PhotosynQ iPhone (iOS) App
PhotosynQ for iOS lets you collect MultispeQ measurements, review results, and upload Project data from an iPhone.
MultispeQ Saddle required
You need the MultispeQ Saddle (Dongle) to connect the iOS app to a MultispeQ. The iPhone connects wirelessly to the Saddle using Bluetooth Low Energy (BLE); the Saddle connects to the MultispeQ's micro-USB port. The app does not connect directly to the MultispeQ's built-in Bluetooth Classic radio.
The app and firmware use MultispeQ Saddle as the product name, shortened to Saddle in controls and instructions.
# What you need
- An iPhone running iOS 17 or newer with PhotosynQ installed.
- A charged MultispeQ Saddle and its MultispeQ USB connection.
- A charged, powered-on MultispeQ.
- Bluetooth enabled and permission for PhotosynQ to use it.
- A PhotosynQ account and internet access to sign in, synchronize Projects and protocols, and upload Project measurements.
# How the connection works
PhotosynQ app on iPhone
        ↕ Bluetooth Low Energy
MultispeQ Saddle
        ↕ USB
MultispeQ micro-USB port
The Saddle carries commands and measurement responses between the app and the instrument. The MultispeQ performs the measurement. Connect to the Saddle from within PhotosynQ; there is no separate Bluetooth pairing step between the Saddle and the MultispeQ.
# Connect the MultispeQ
- Attach the Saddle's instrument USB connection to the MultispeQ's micro-USB port. Turn on both devices and keep the Saddle near the iPhone.
- Open PhotosynQ and select Measure in the bottom navigation.
- Select Connect MultispeQ. When already connected, this action is Manage Connection.
- Allow Bluetooth access when iOS requests it, then select Scan for Saddles.
- Select your Saddle under Nearby Devices. A previously used Saddle may also appear under Known Devices.
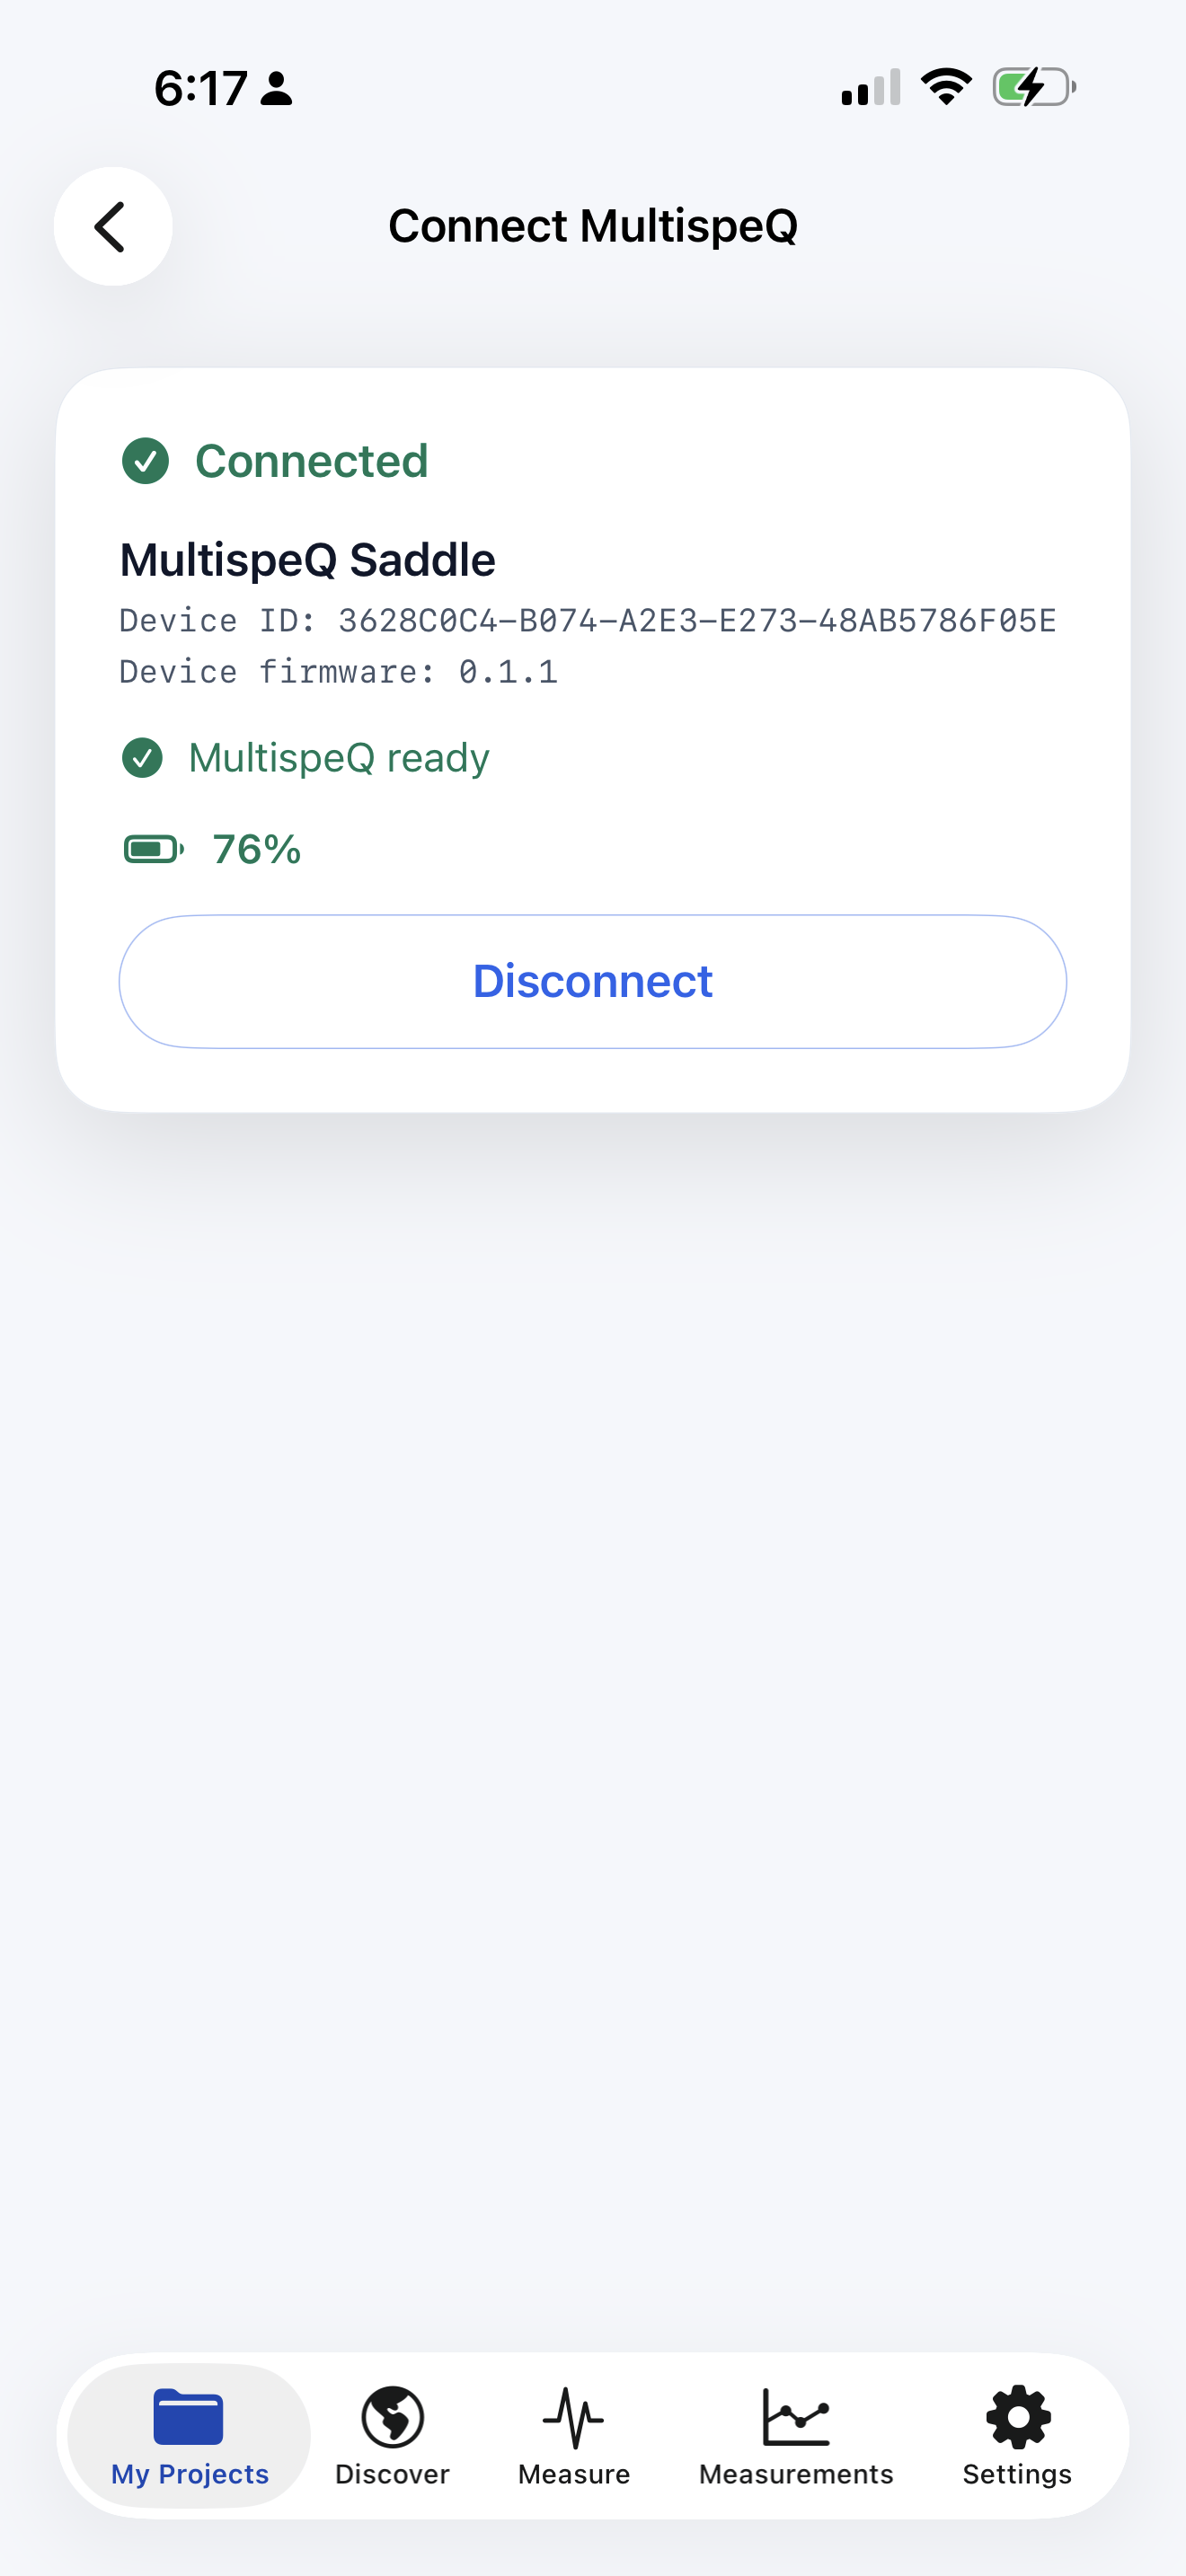
- Wait for the connection screen to show Connected and MultispeQ ready before starting a measurement or QC check.
Earlier prototype builds may still show “Dongle.” Update both the app and Saddle firmware to use the new naming.
Connected confirms the iPhone-to-Saddle Bluetooth connection. MultispeQ ready confirms the instrument is available through the Saddle. If the screen says Connect MultispeQ to the Saddle and turn it on, check the instrument power and USB connection even though Bluetooth is connected.
When available, the battery indicator on this connection screen reports the Saddle battery. It is separate from the MultispeQ's battery.
# Find your workflow
| Bottom tab | Main actions |
|---|---|
| My Projects | Open joined Projects, review instructions, select a protocol, and answer Project questions before measuring. |
| Discover | Search for discoverable Projects and request to join eligible Projects. |
| Measure | Connect or manage the Saddle, choose a Quick Measurement protocol, or open MultispeQ QC. |
| Measurements | Review locally saved results and upload eligible pending Project measurements. |
| Settings | Manage the account, upload preferences, notifications, and support. |
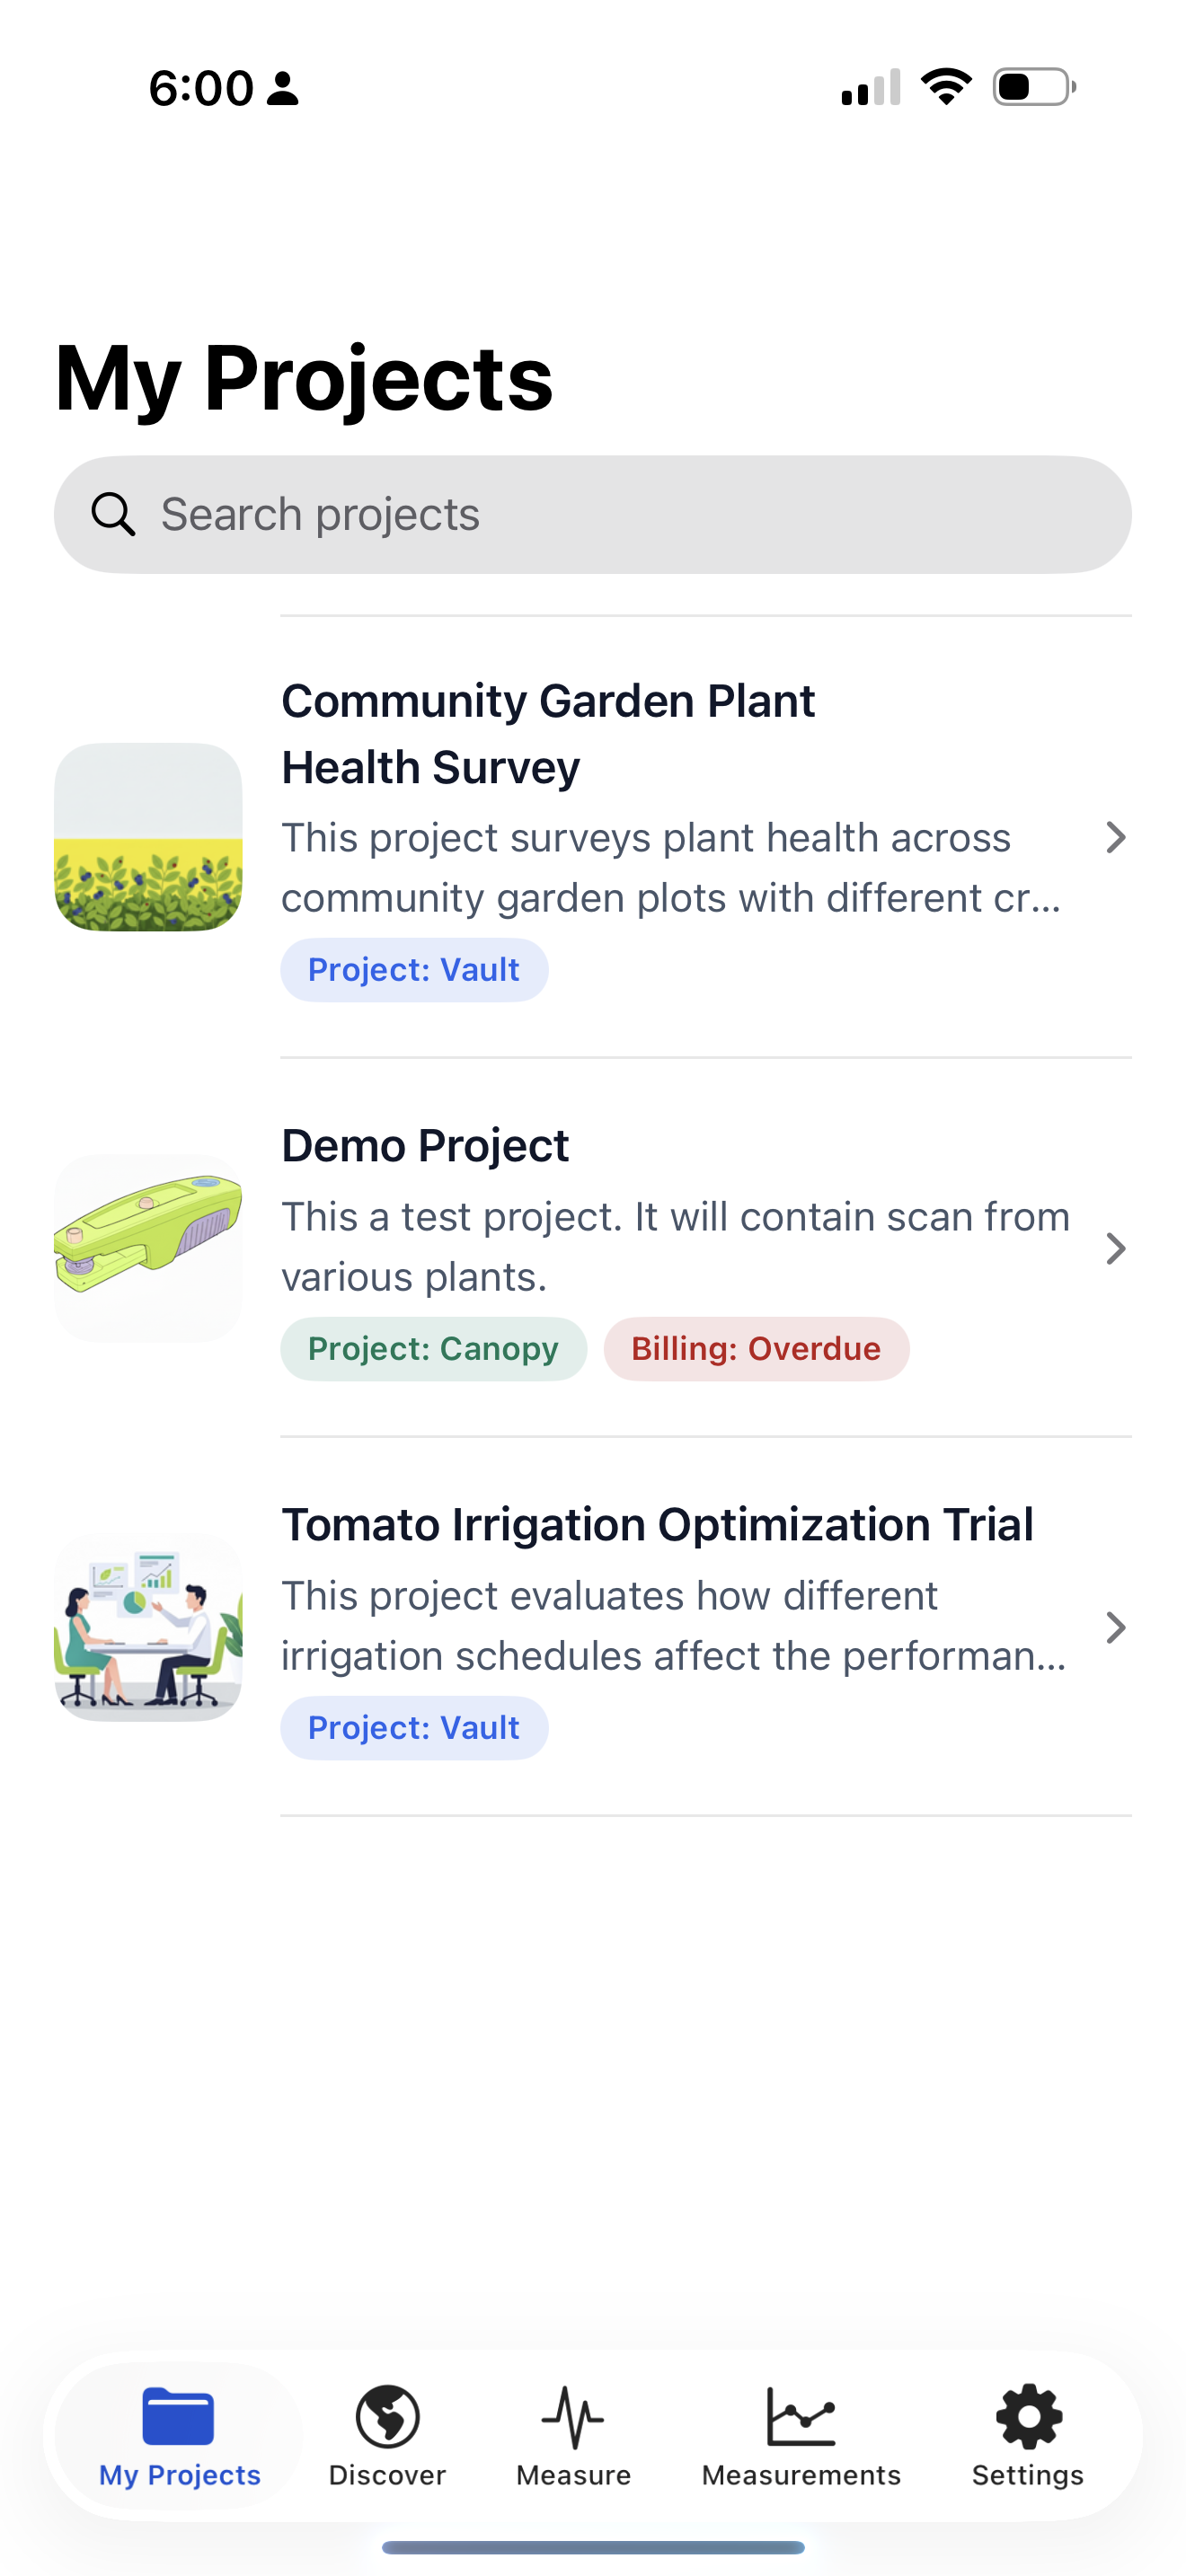
These full-screen images were captured from the iPhone app on October 9, 2026. The connected screen shows a physical MultispeQ Saddle and native back navigation.
# Start a Project measurement
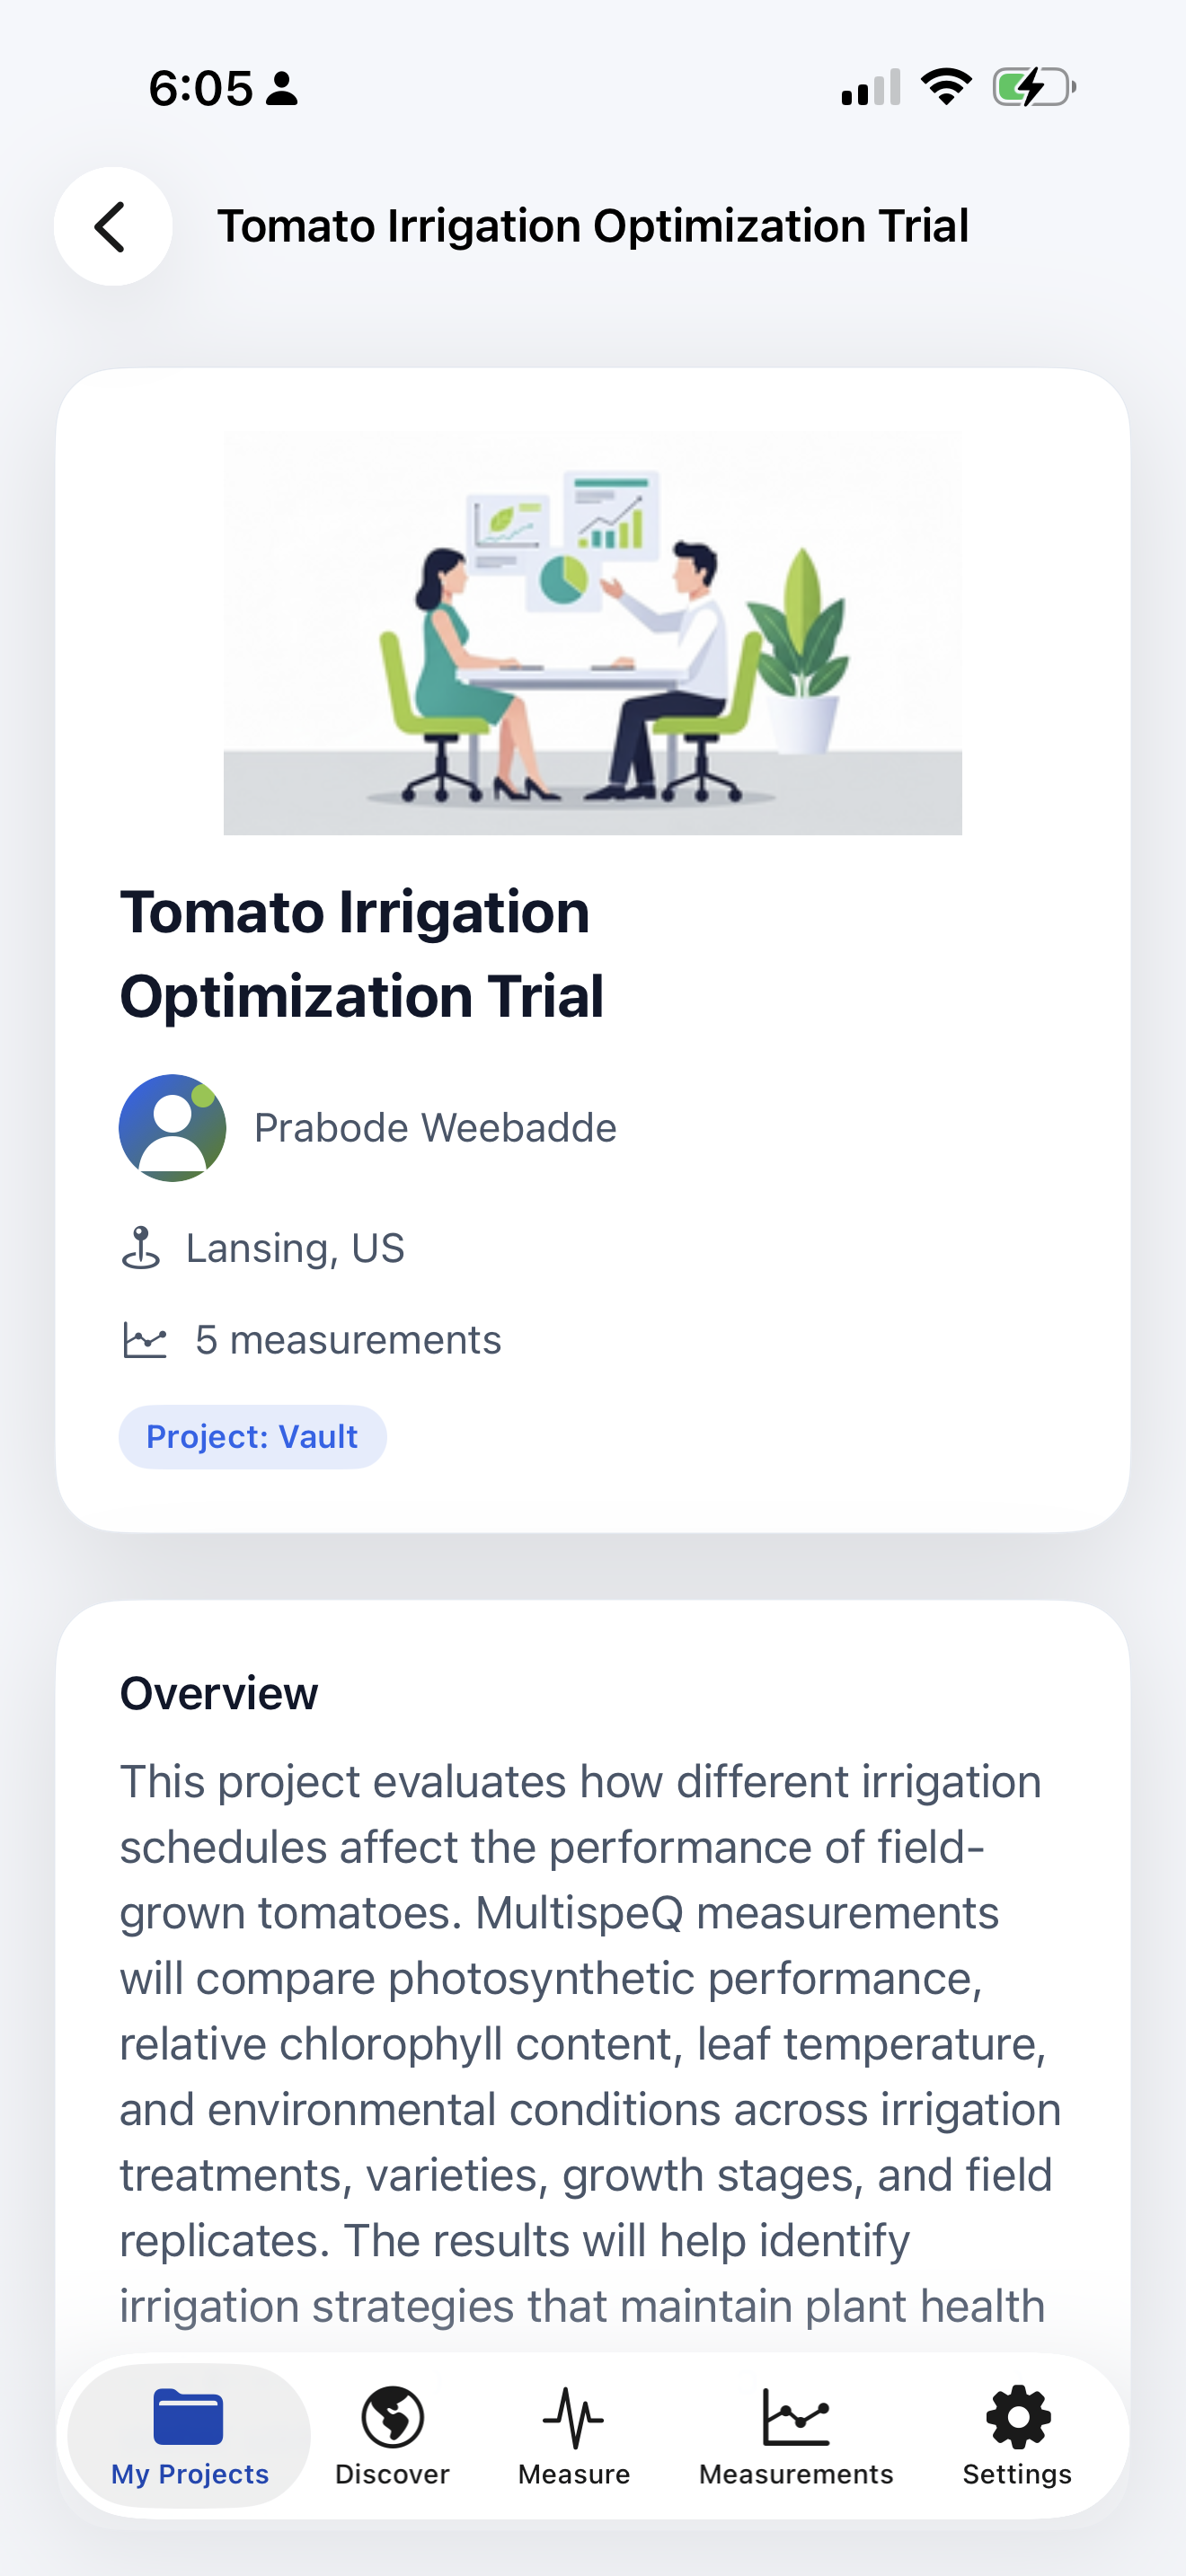
- Open My Projects, select the Project, and review its collection instructions.
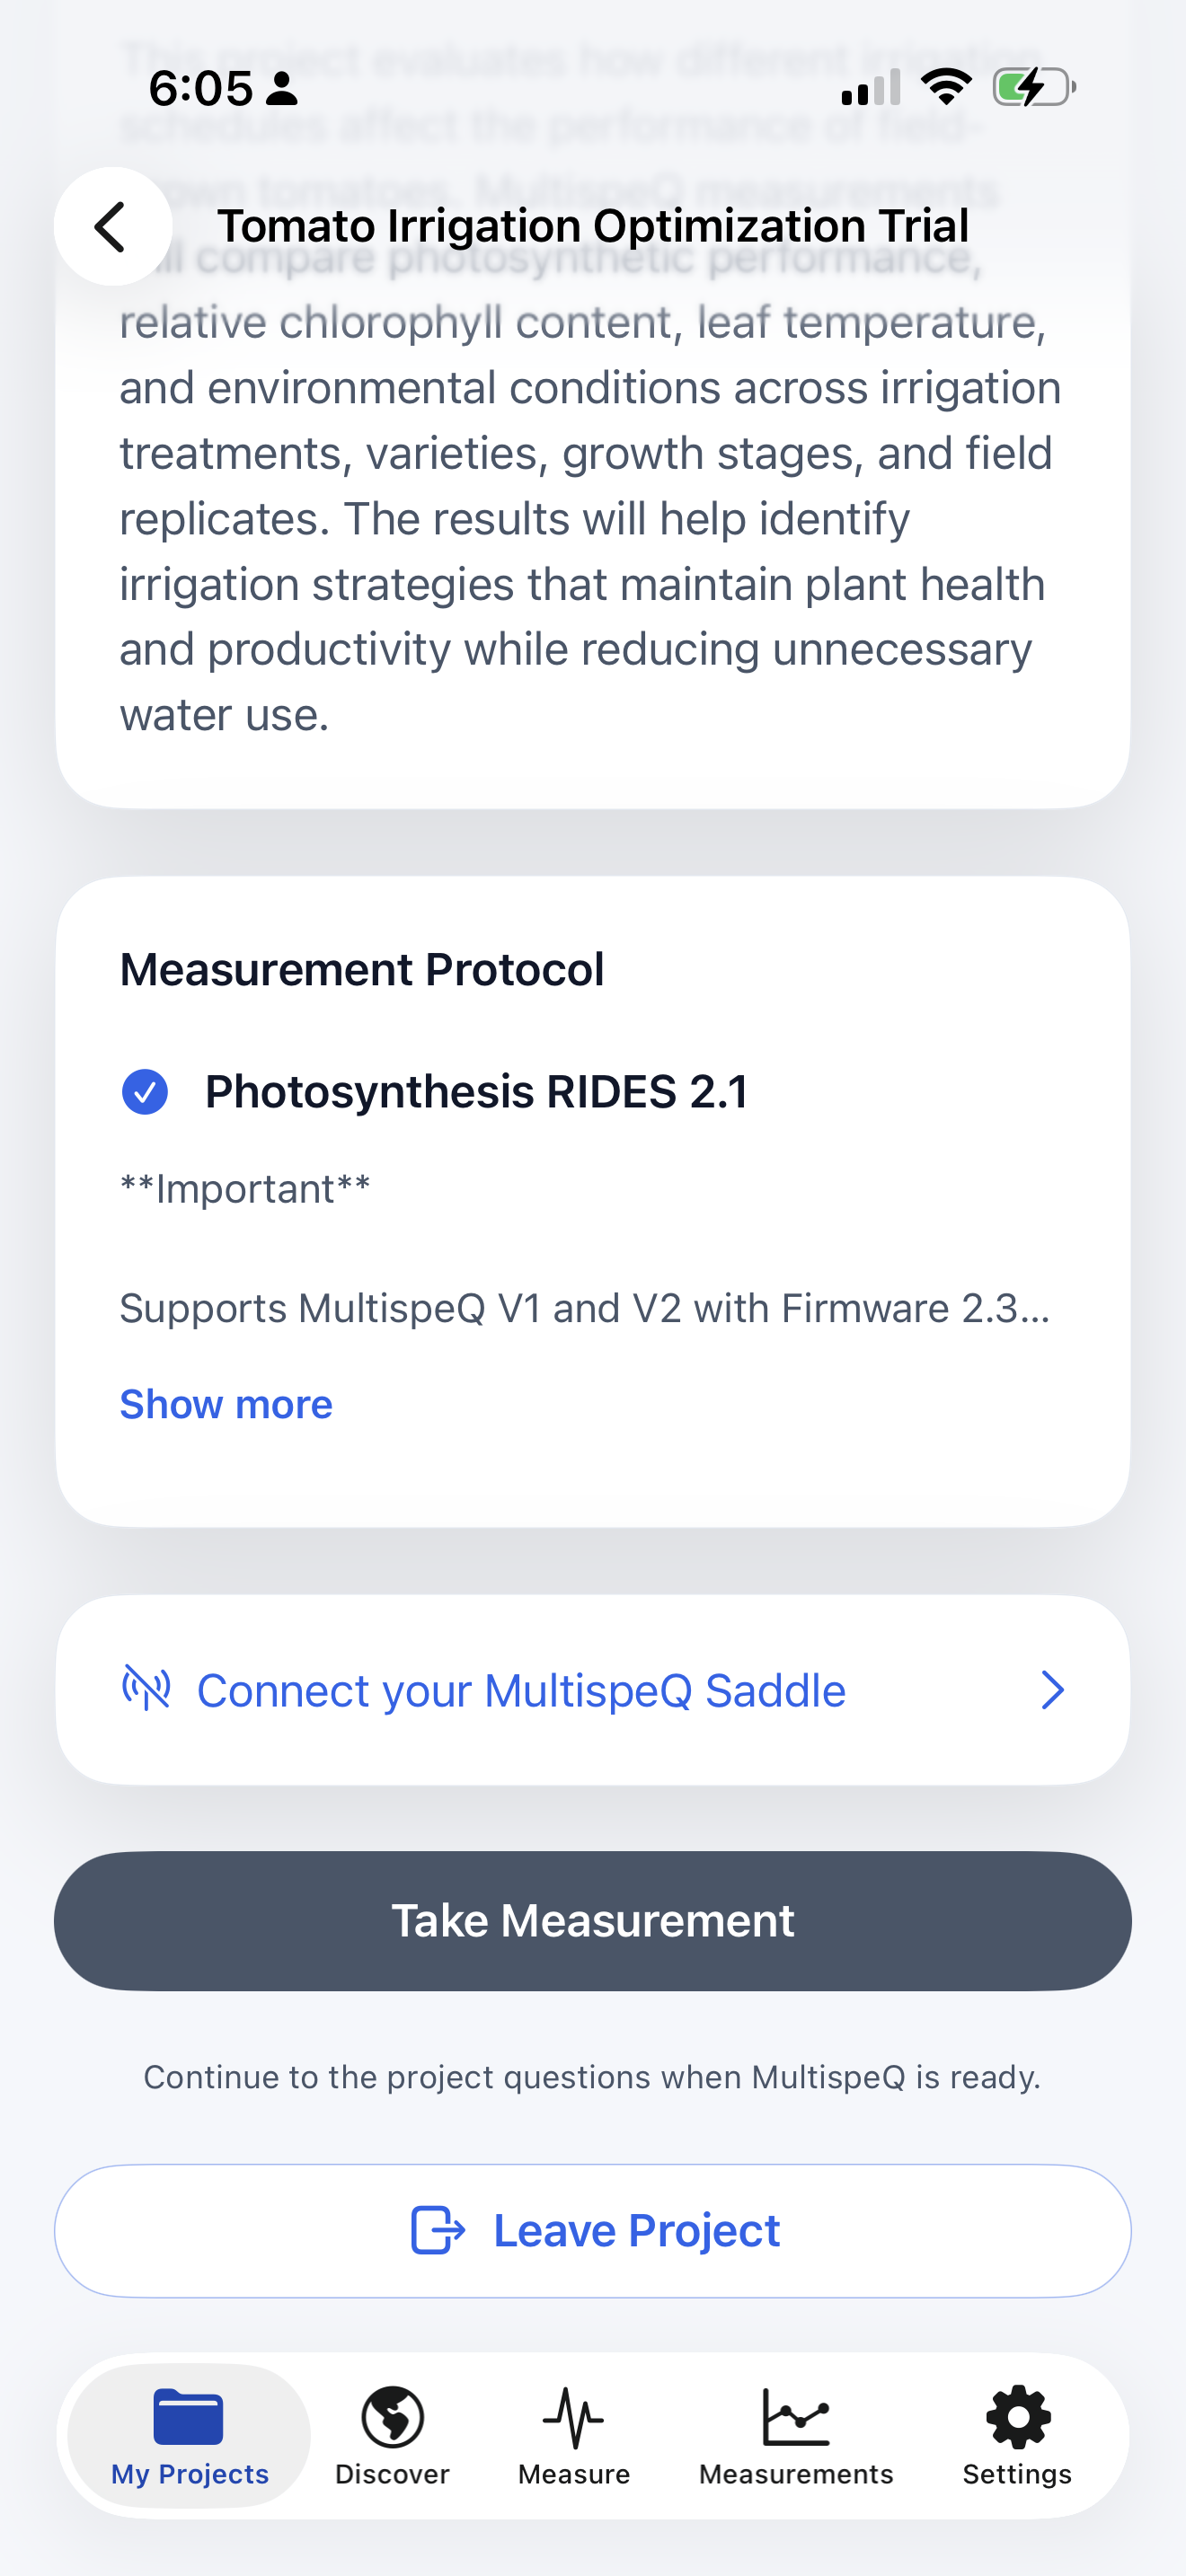
- Select the measurement protocol. The connection card above Take Measurement shows whether MultispeQ is ready.
- If disconnected, select Connect your MultispeQ Saddle to open the Saddle connection screen directly from the Project, then connect the Saddle. If the Saddle is already connected but the instrument is unavailable, check the MultispeQ power and USB connection.
- Wait for MultispeQ ready, then tap the native back arrow at the top left to return to the same Project and selected protocol. The app stays in My Projects during this connection flow and does not return automatically.
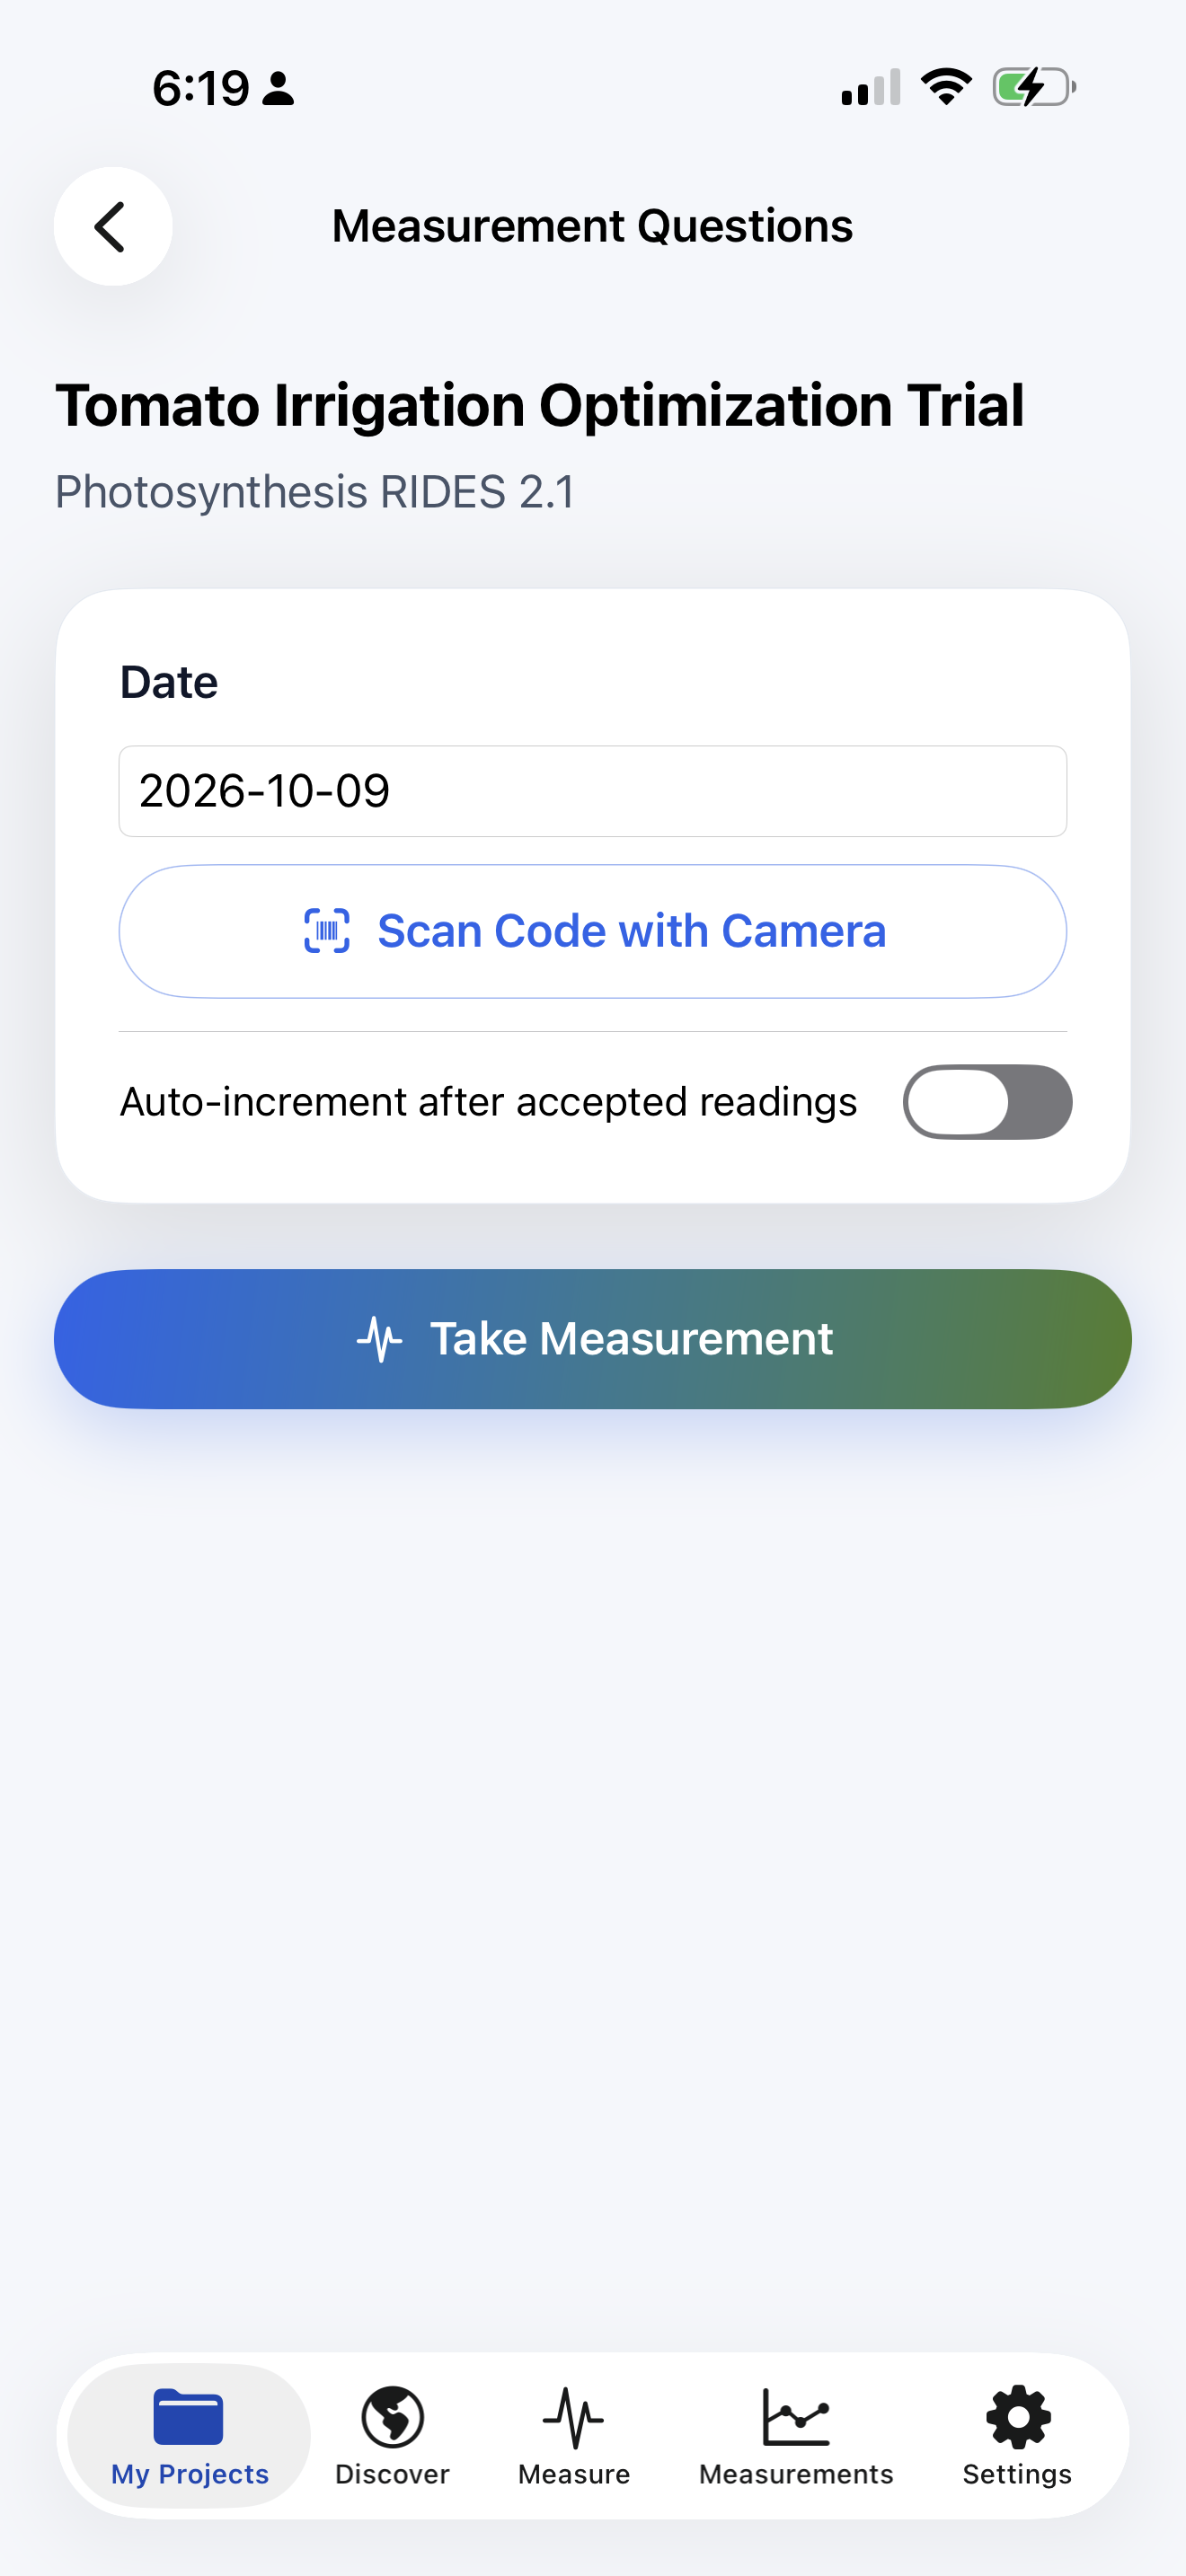
- Select Take Measurement to open Measurement Questions, complete the required answers, and start the reading.
- Review the result before accepting it, then confirm its upload status in Measurements.
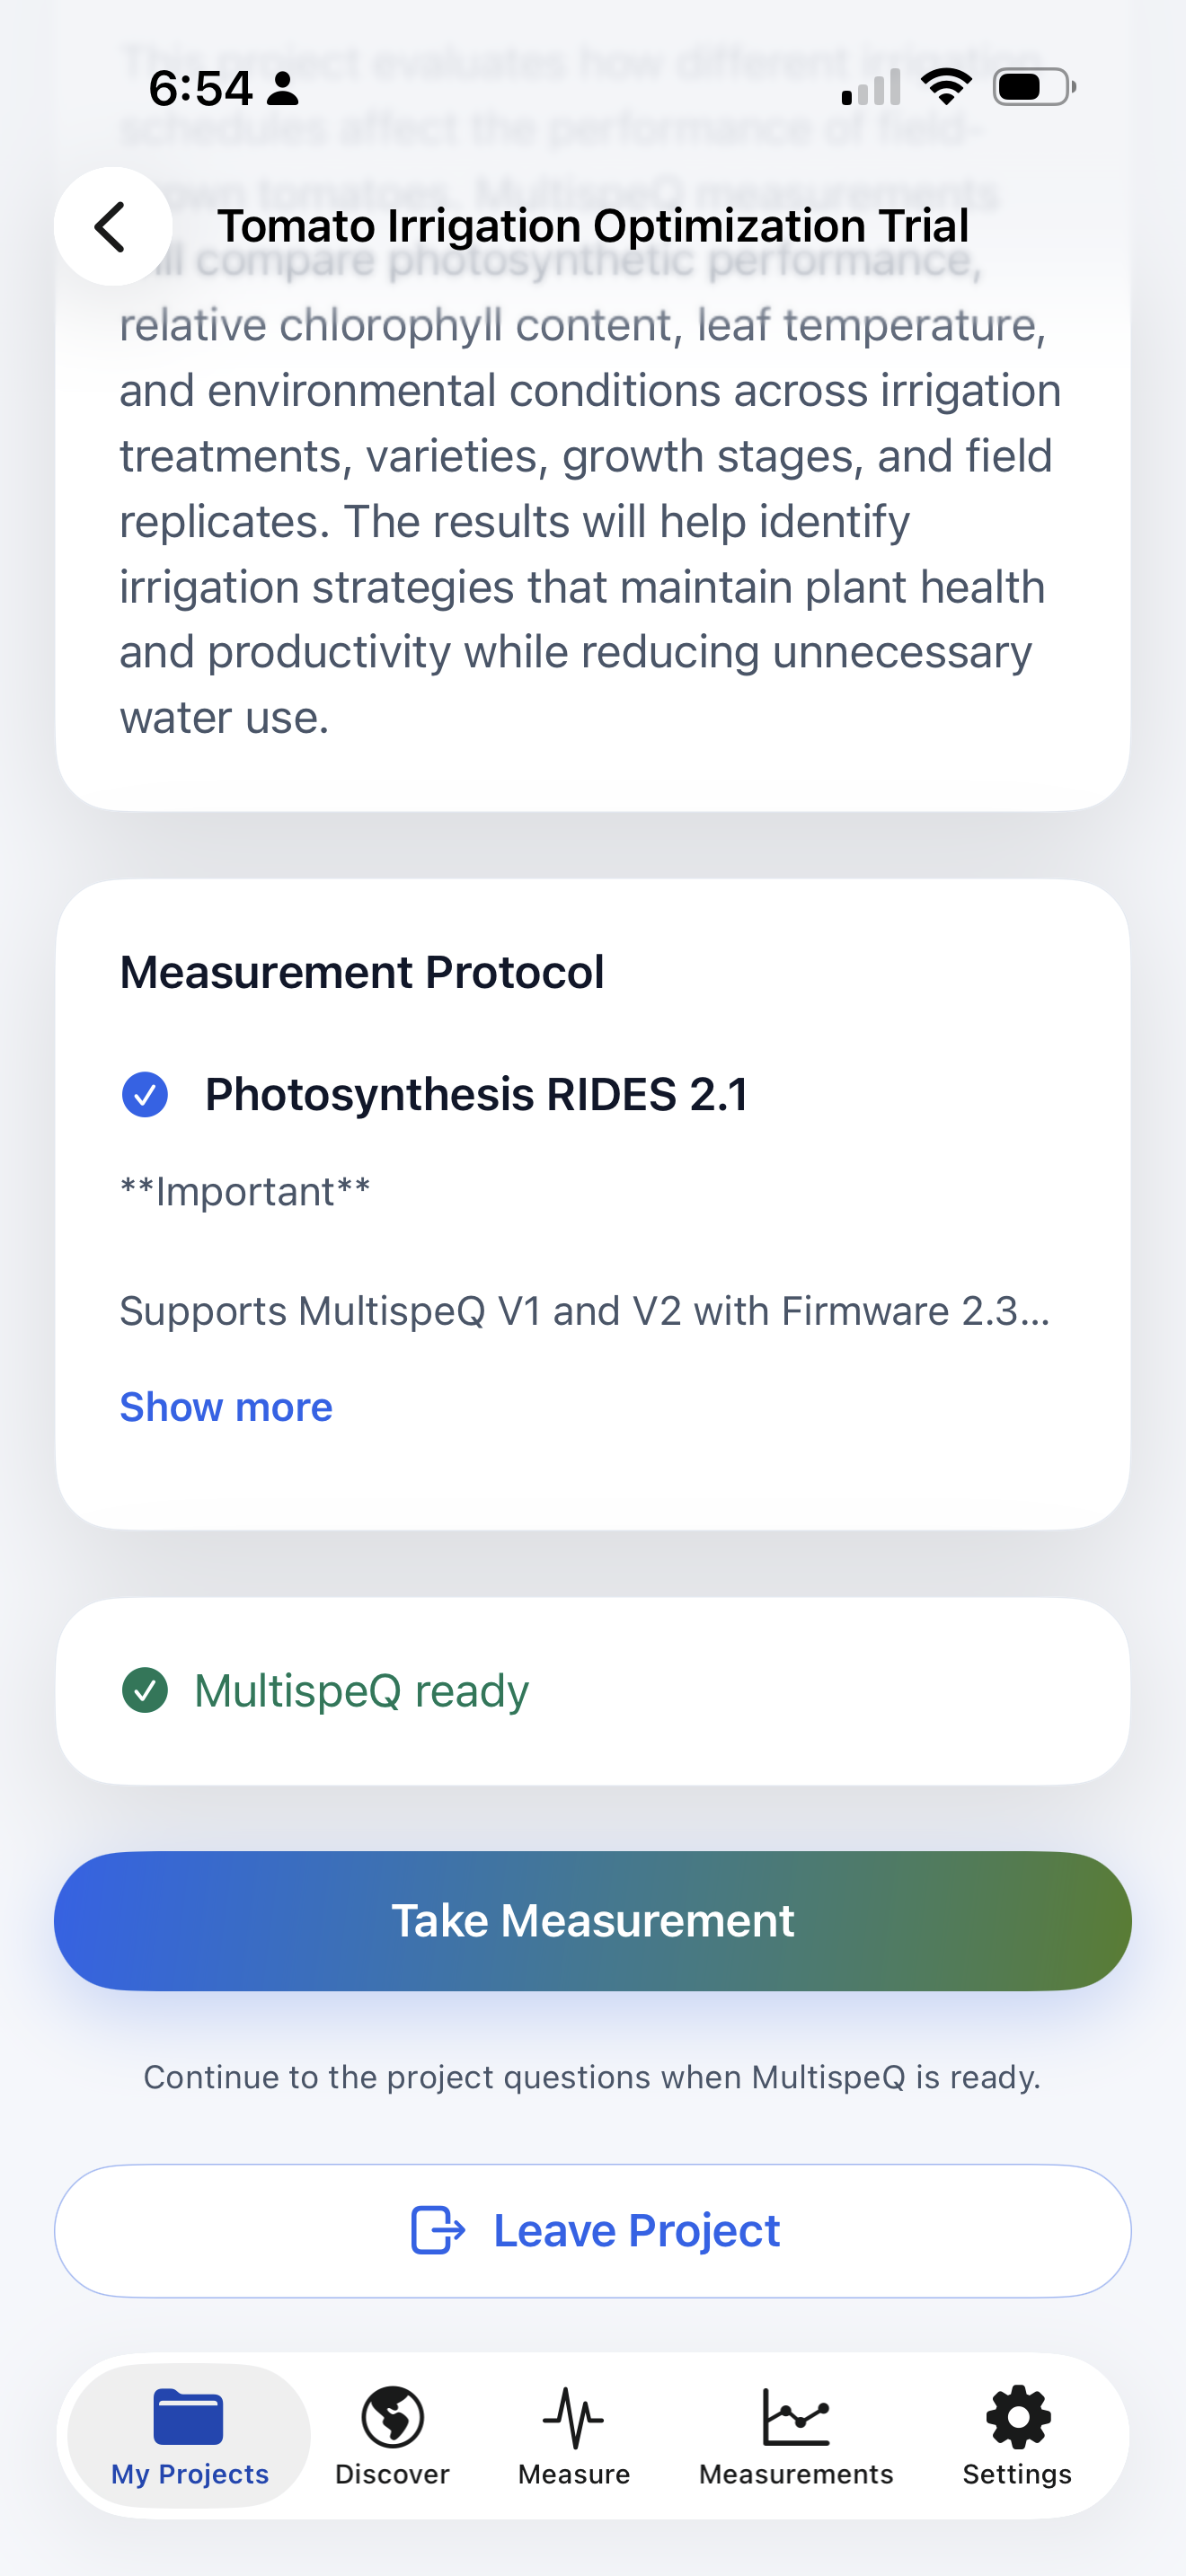
Take Measurement stays disabled until a protocol is selected and the instrument is ready. Archived Projects cannot collect new measurements; an overdue billing status does not block collection.
If the instrument disconnects while Measurement Questions is open, select Check connection, restore readiness, and tap the top-left back arrow to resume those questions with your answers preserved.
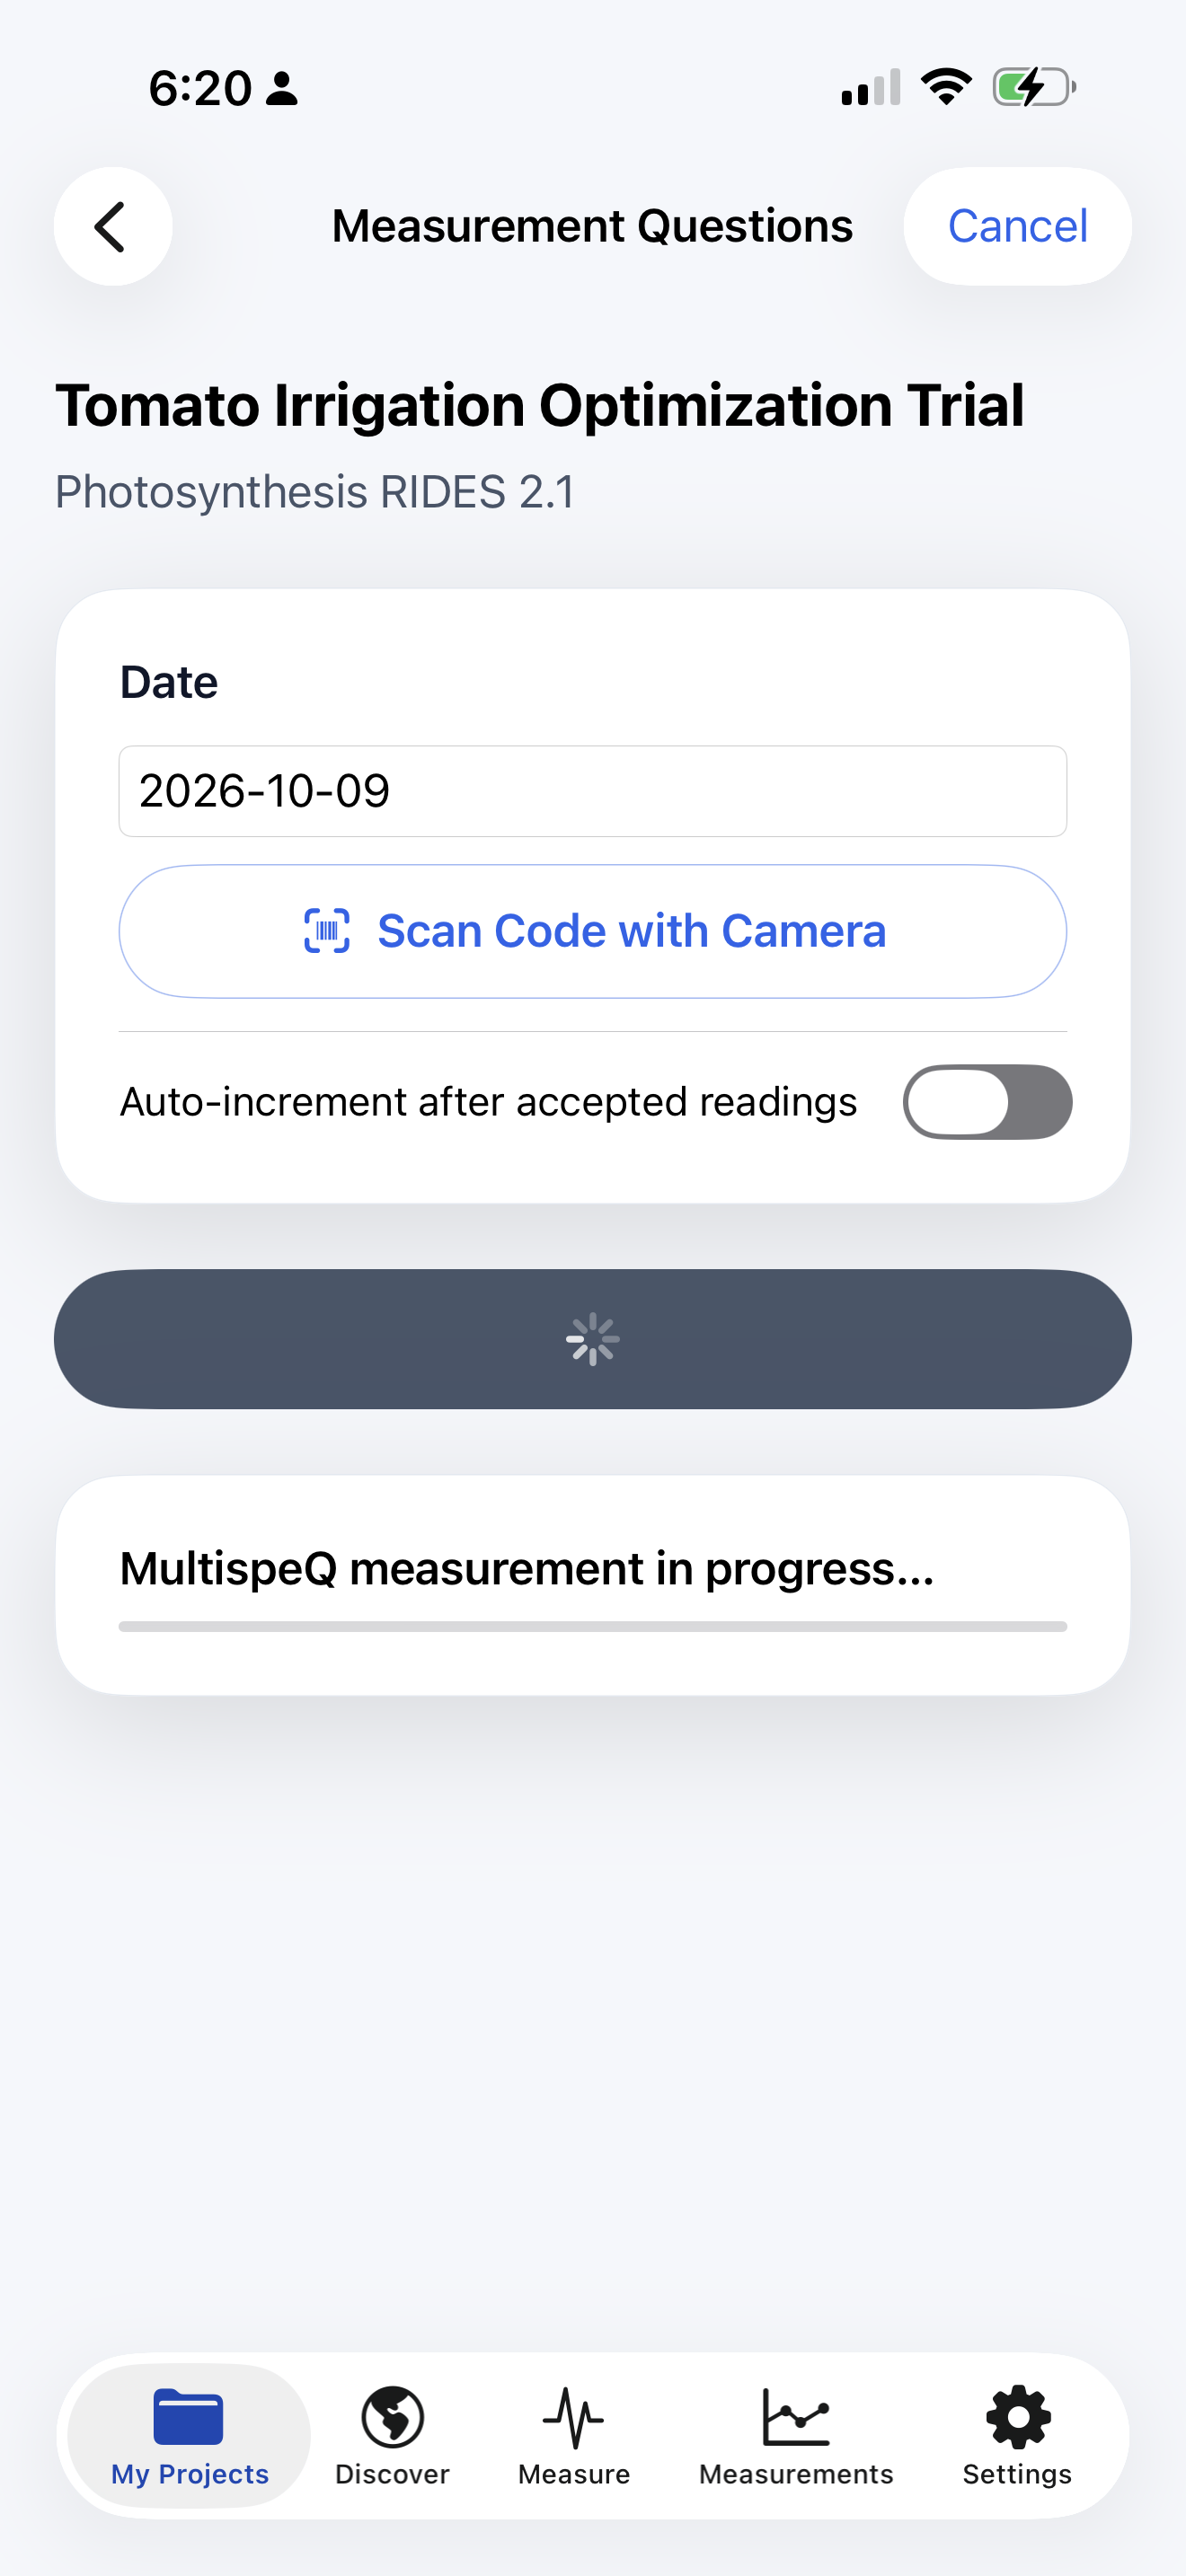
Keep the leaf and instrument steady while the protocol runs. Follow its clamp prompts and wait for the result before starting another reading.
# Inspect a measurement
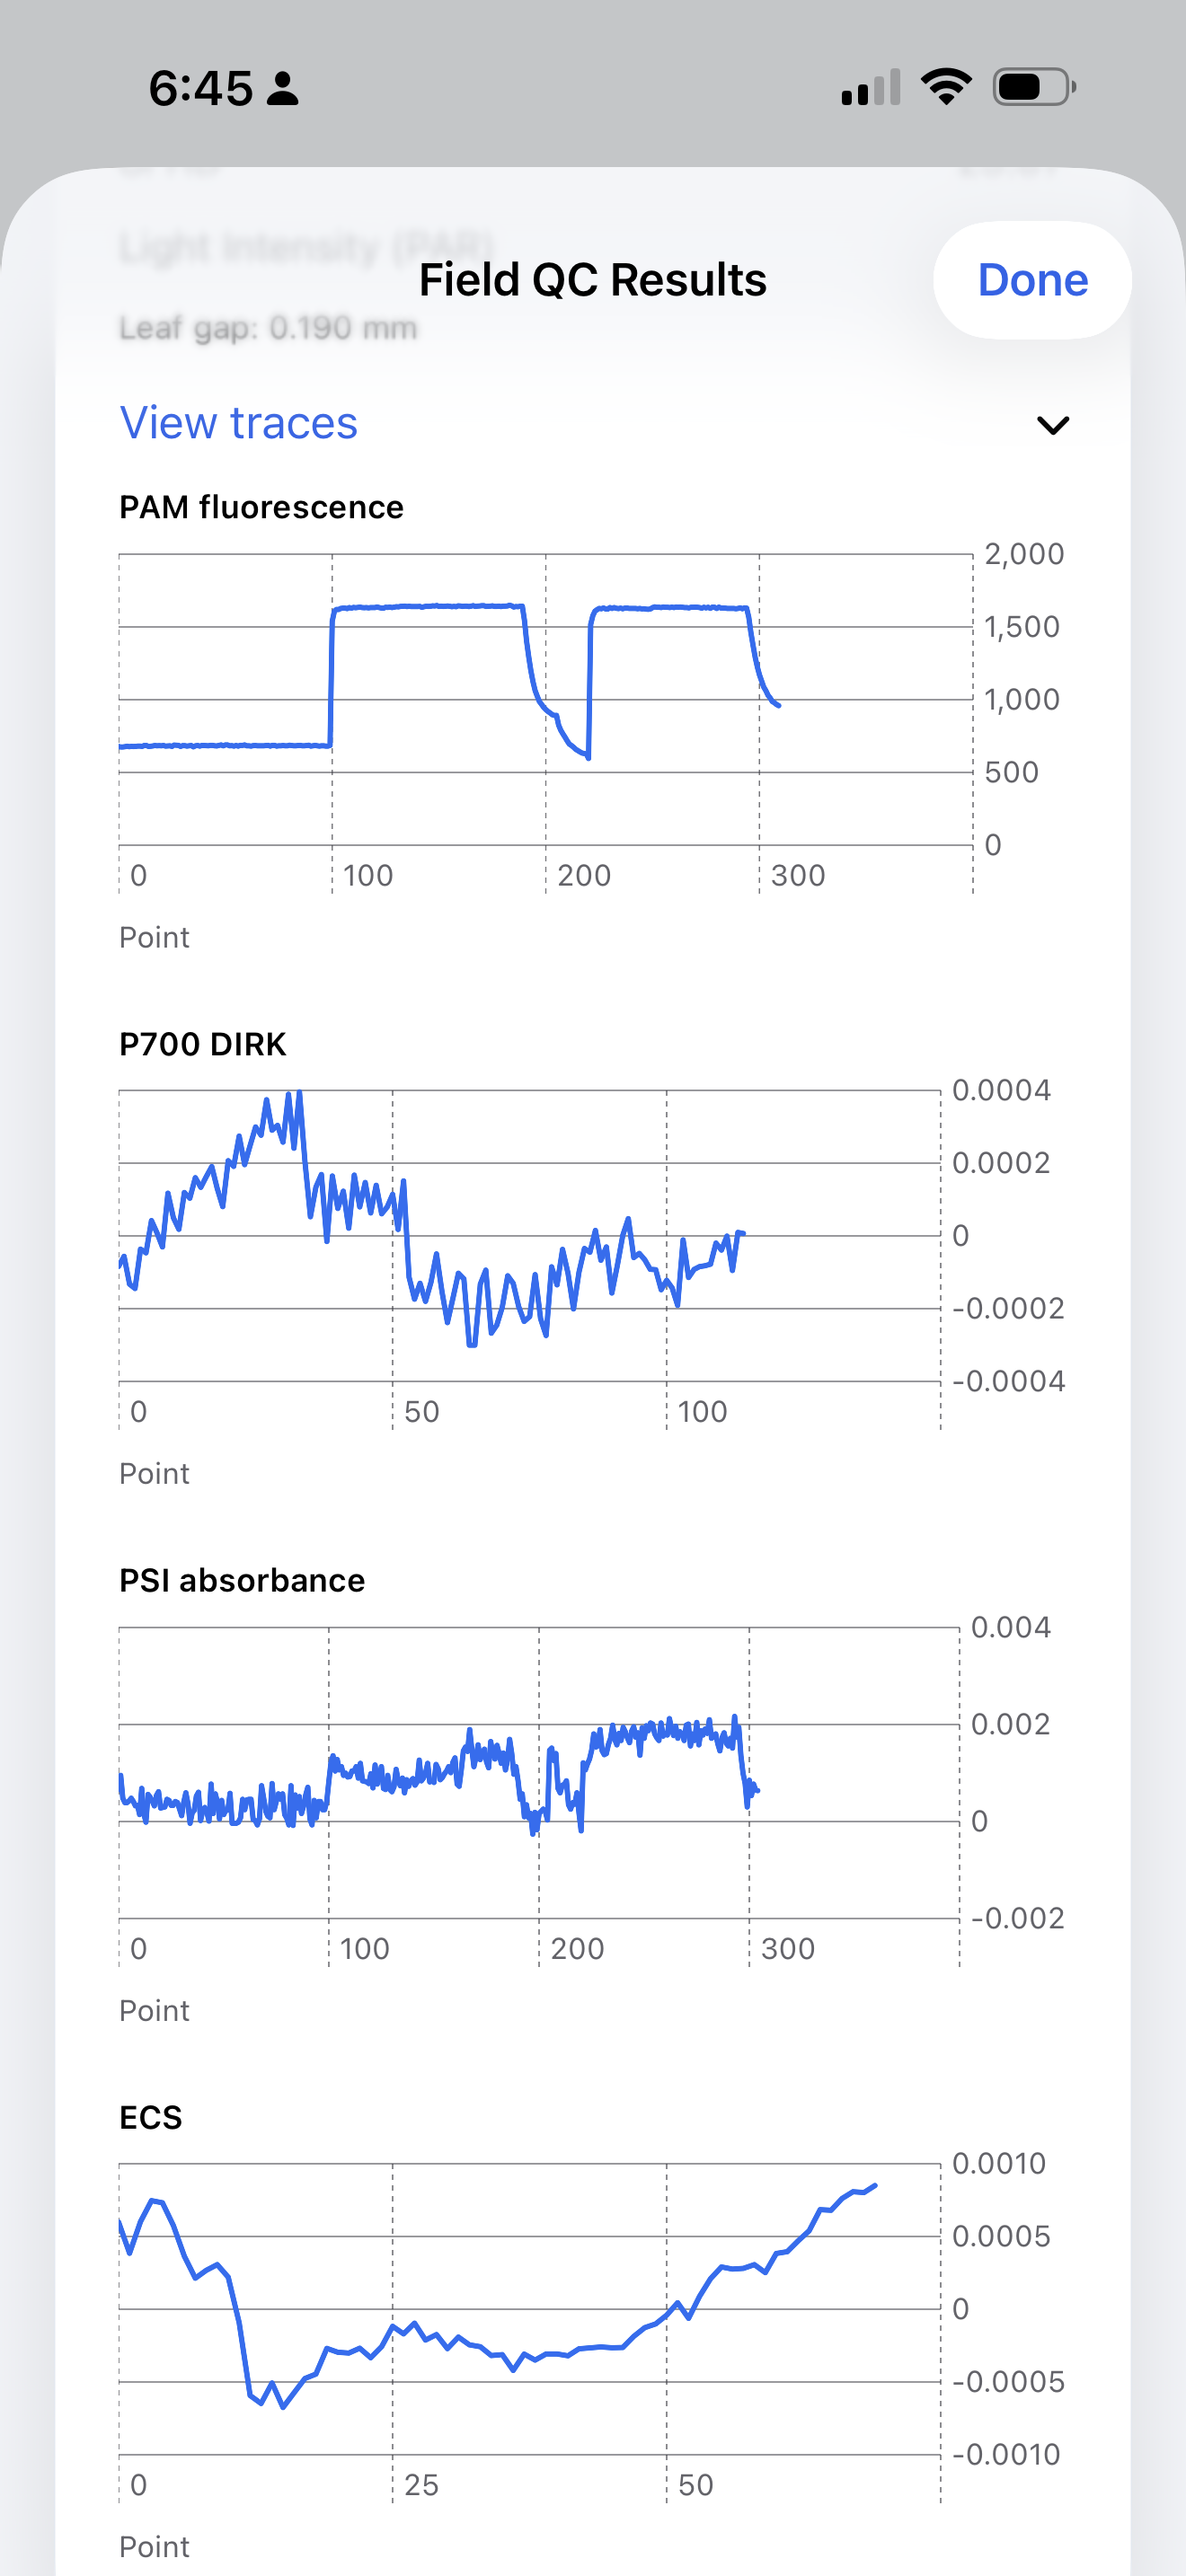
The Measurement Result card shows key values in compact rows. Warnings stay visible; expand More values for additional results and View traces for stacked graphs. Supported traces from the selected protocol’s macro include PAM fluorescence, P700 DIRK, PSI absorbance, and ECS. For protocols that do not return supported processed traces, fallback detector graphs are labelled (raw). Invalid processed traces are flagged rather than replaced silently with raw data. Older saved detector traces also retain that label.
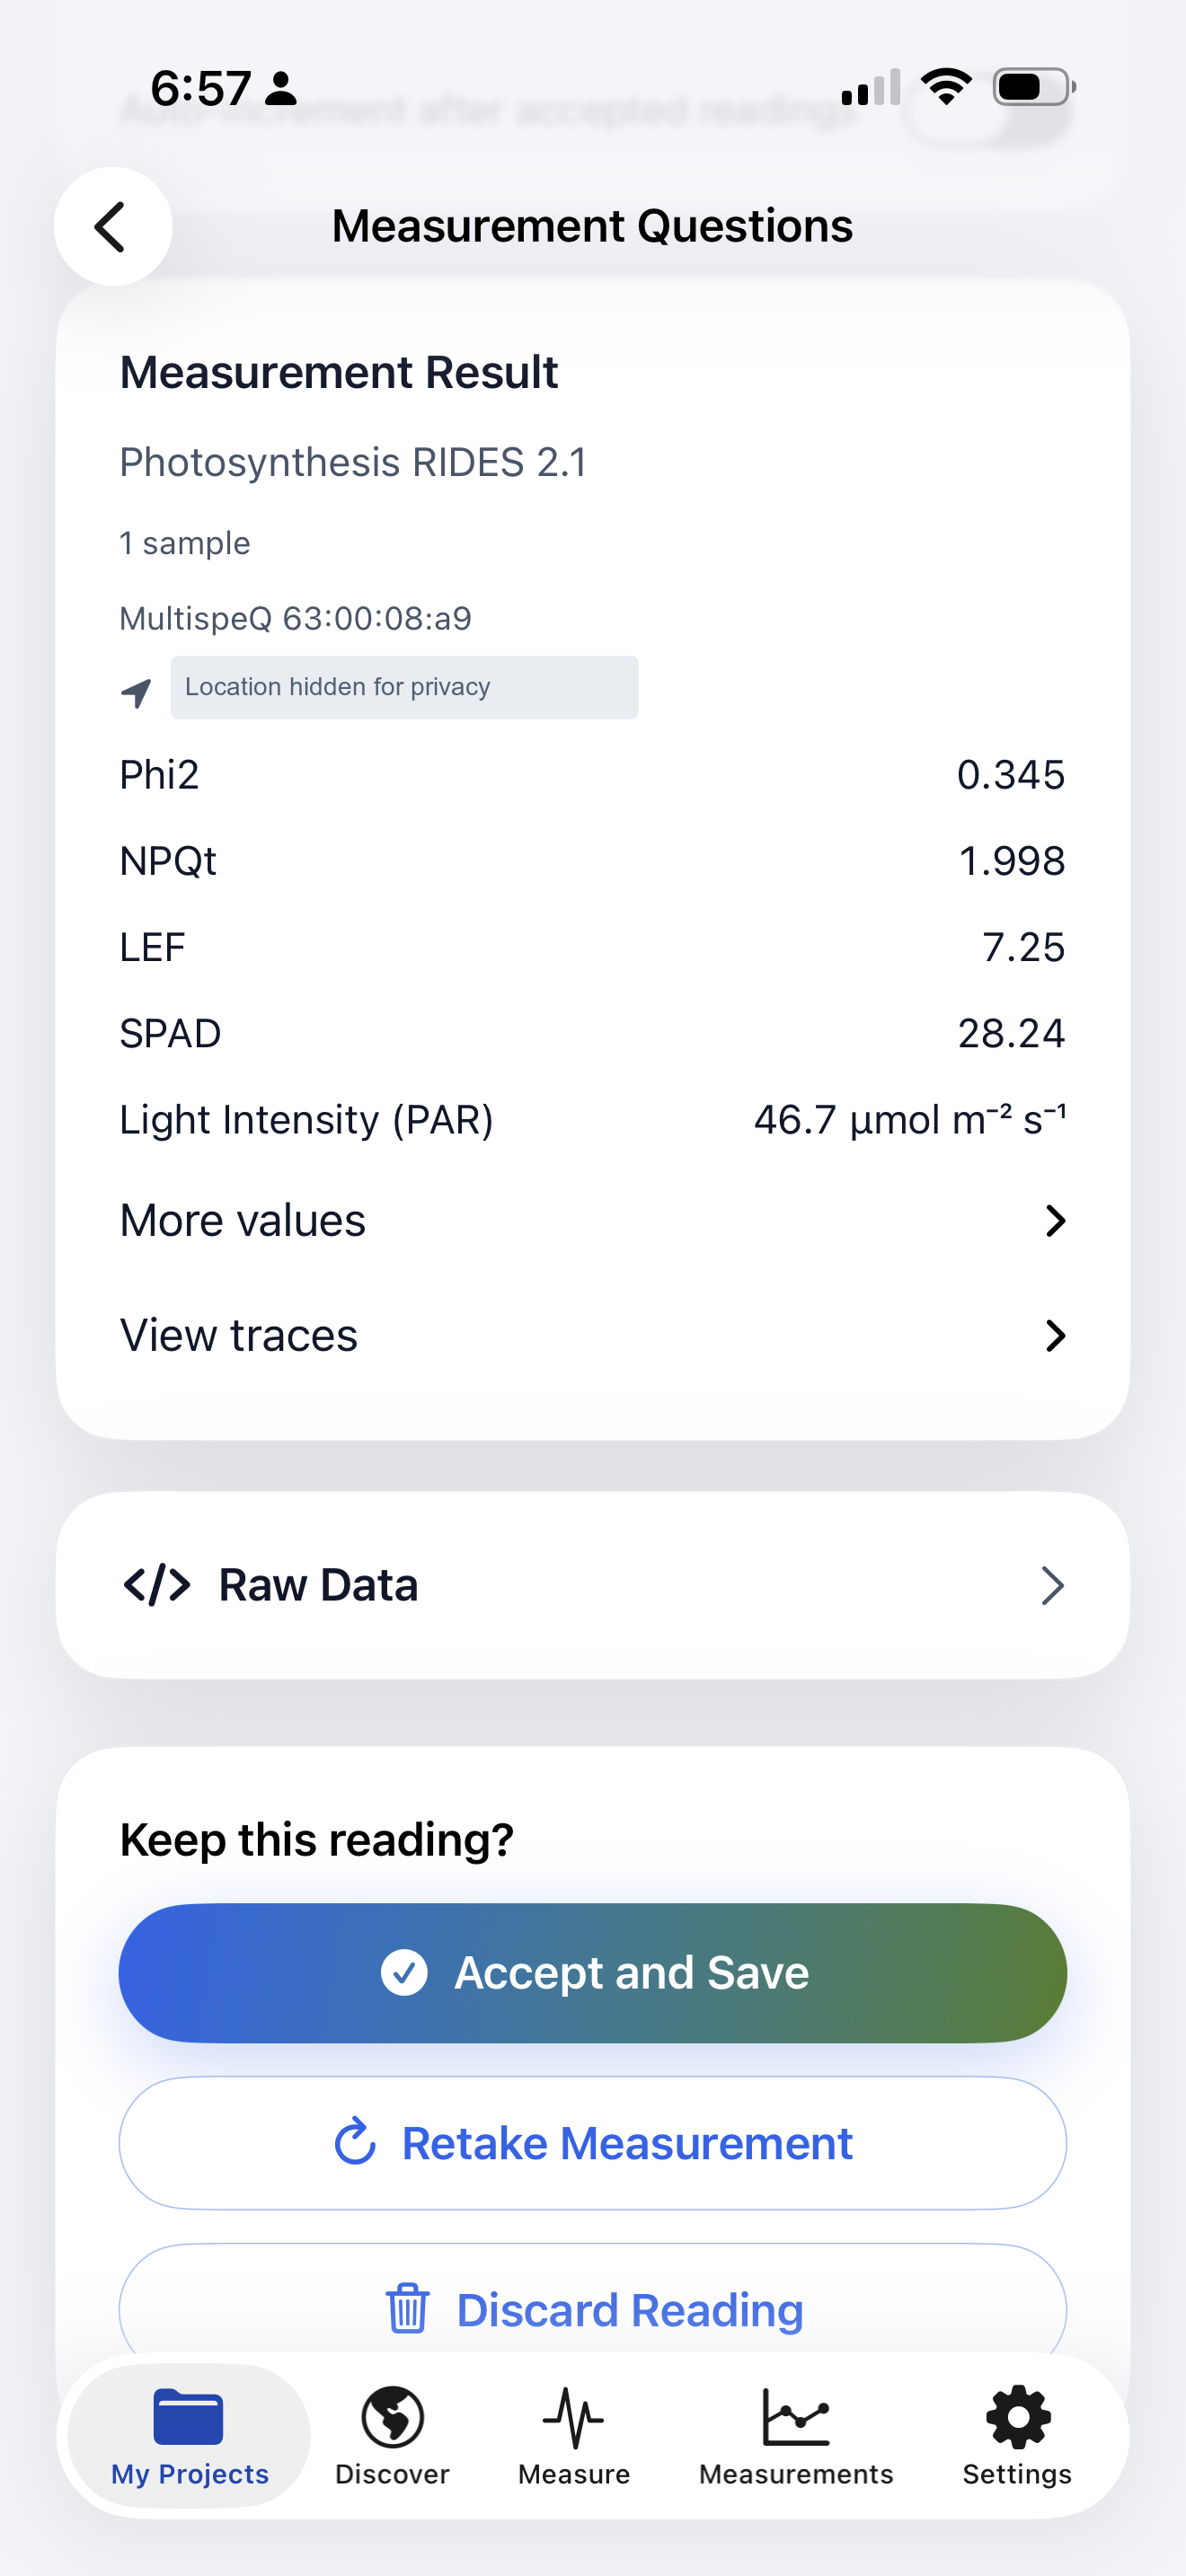
For a new Project reading, choose Accept and Save to keep it, Retake Measurement to repeat it, or Discard Reading to reject it. Scroll if needed to reach the actions. Opening a graph or Raw Data does not accept the reading.
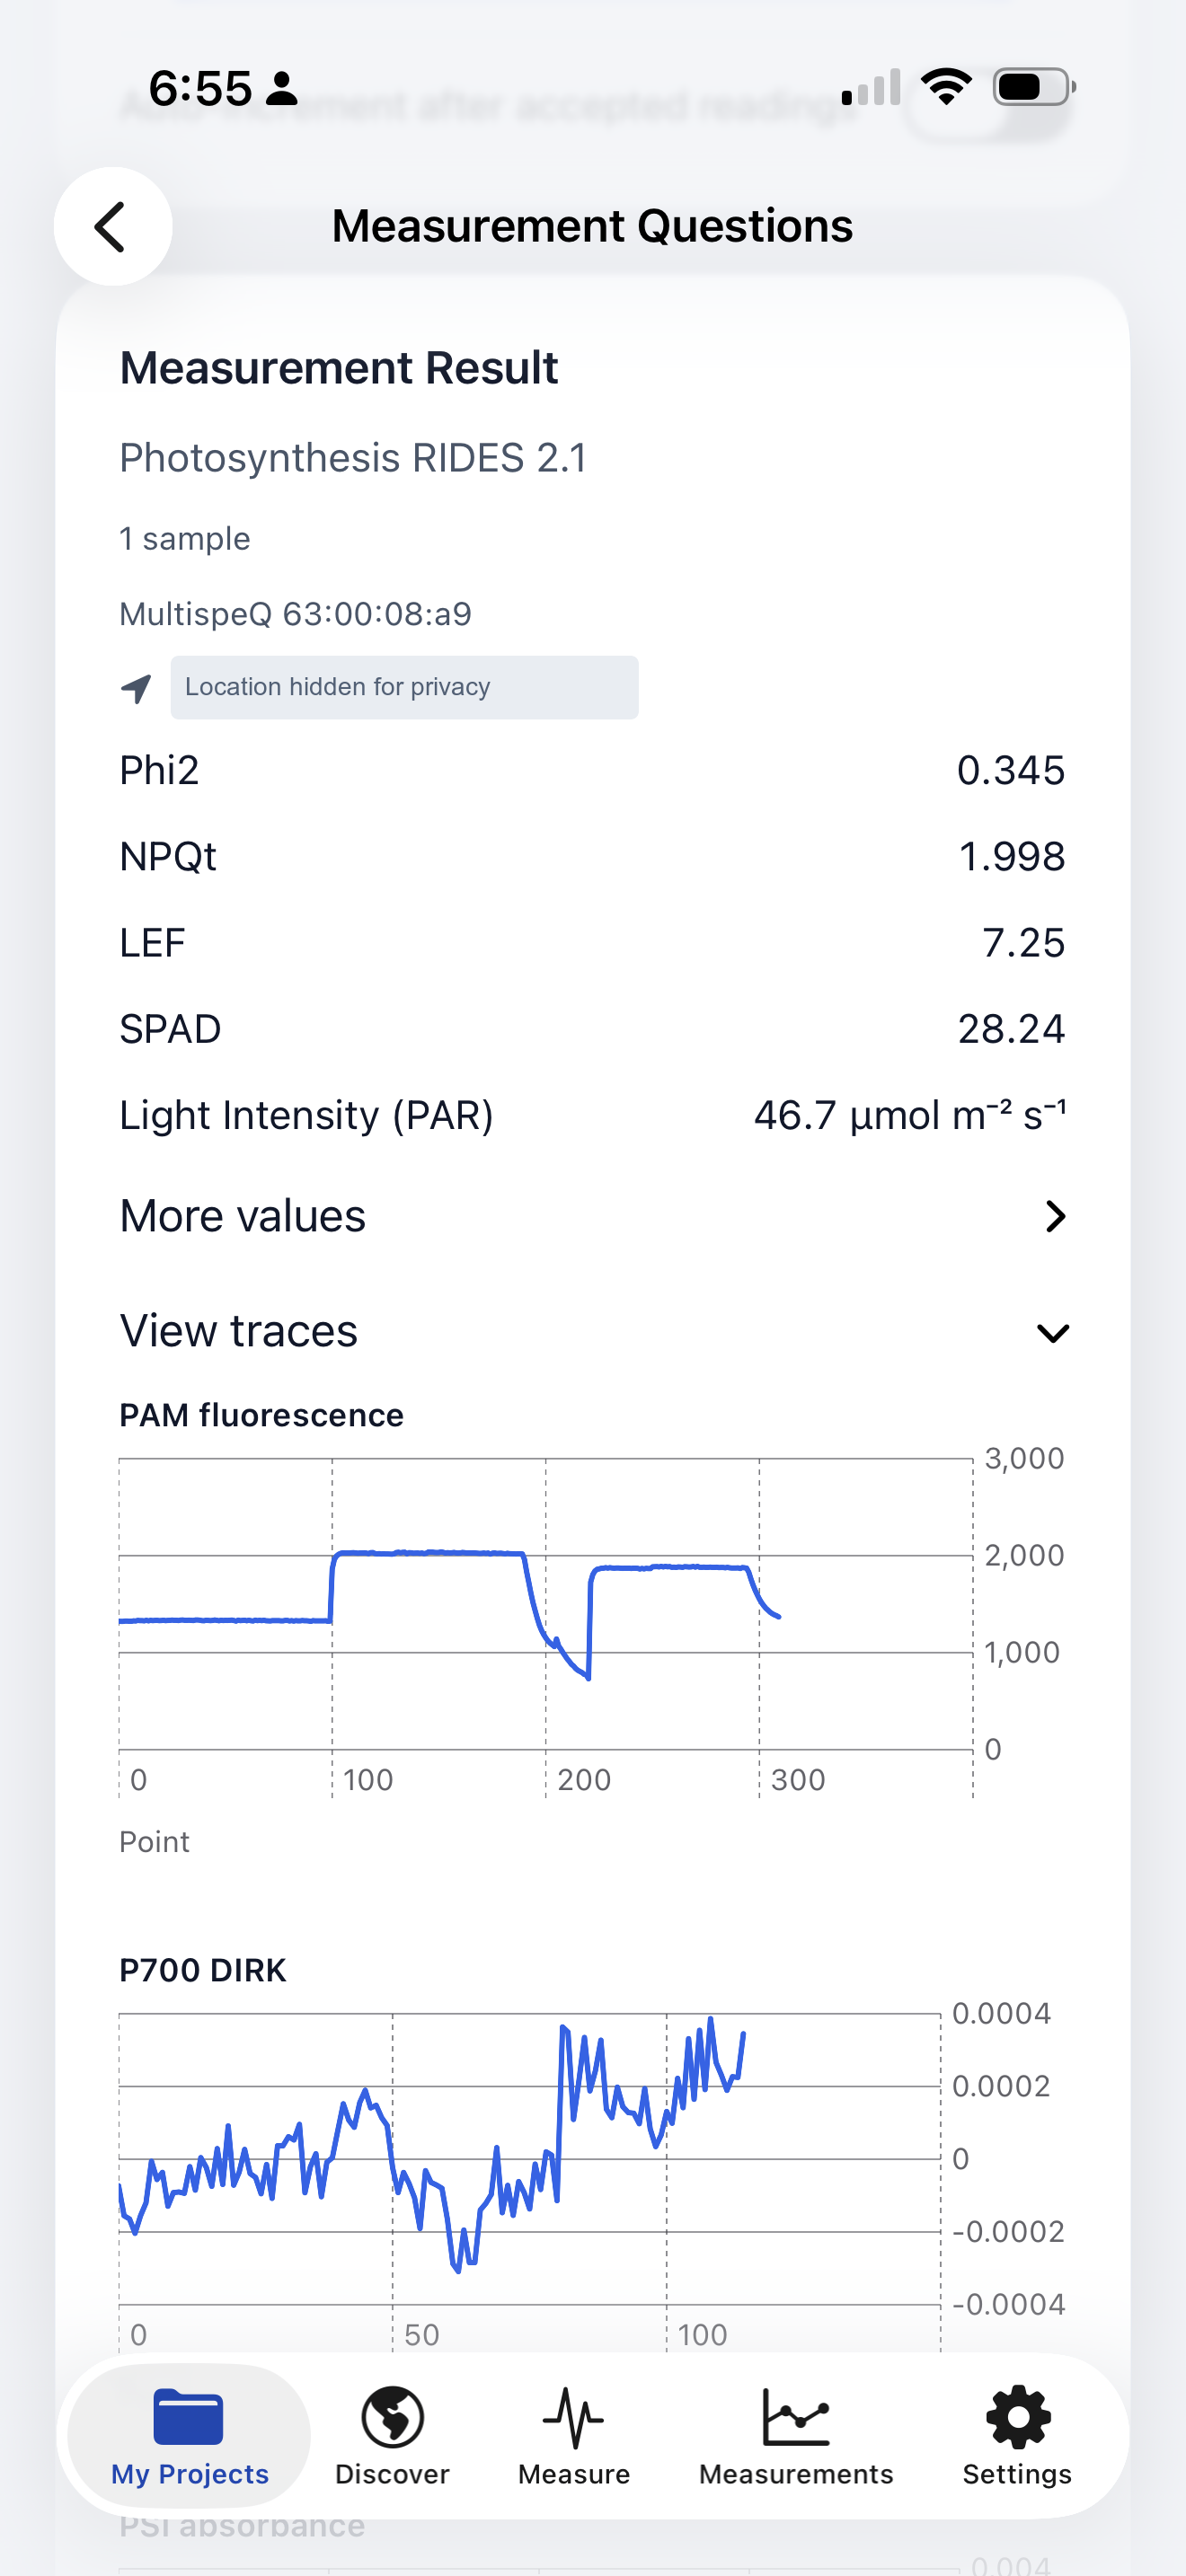
The result examples show one real reading before acceptance. Precise location coordinates are masked in these documentation images; measurement values and warnings are unchanged.
On a completed reading or a saved measurement, tap Raw Data to open its formatted JSON response. Scroll to inspect the object, select text, or tap Copy at the top left to copy the complete raw JSON. Tap the circular X at the top right to close the modal and return to the result.
# Quick Measurements and QC
For an individual protocol run, open Measure → Choose a Protocol. Quick Measurements are local results and are not uploaded as Project contributions.
Before field collection, open Measure → Open MultispeQ QC. Complete Device QC with the empty clamp closed, then follow Field QC's representative-leaf instructions. Recheck readiness after reconnecting or changing the instrument.
# Field QC progress and traces
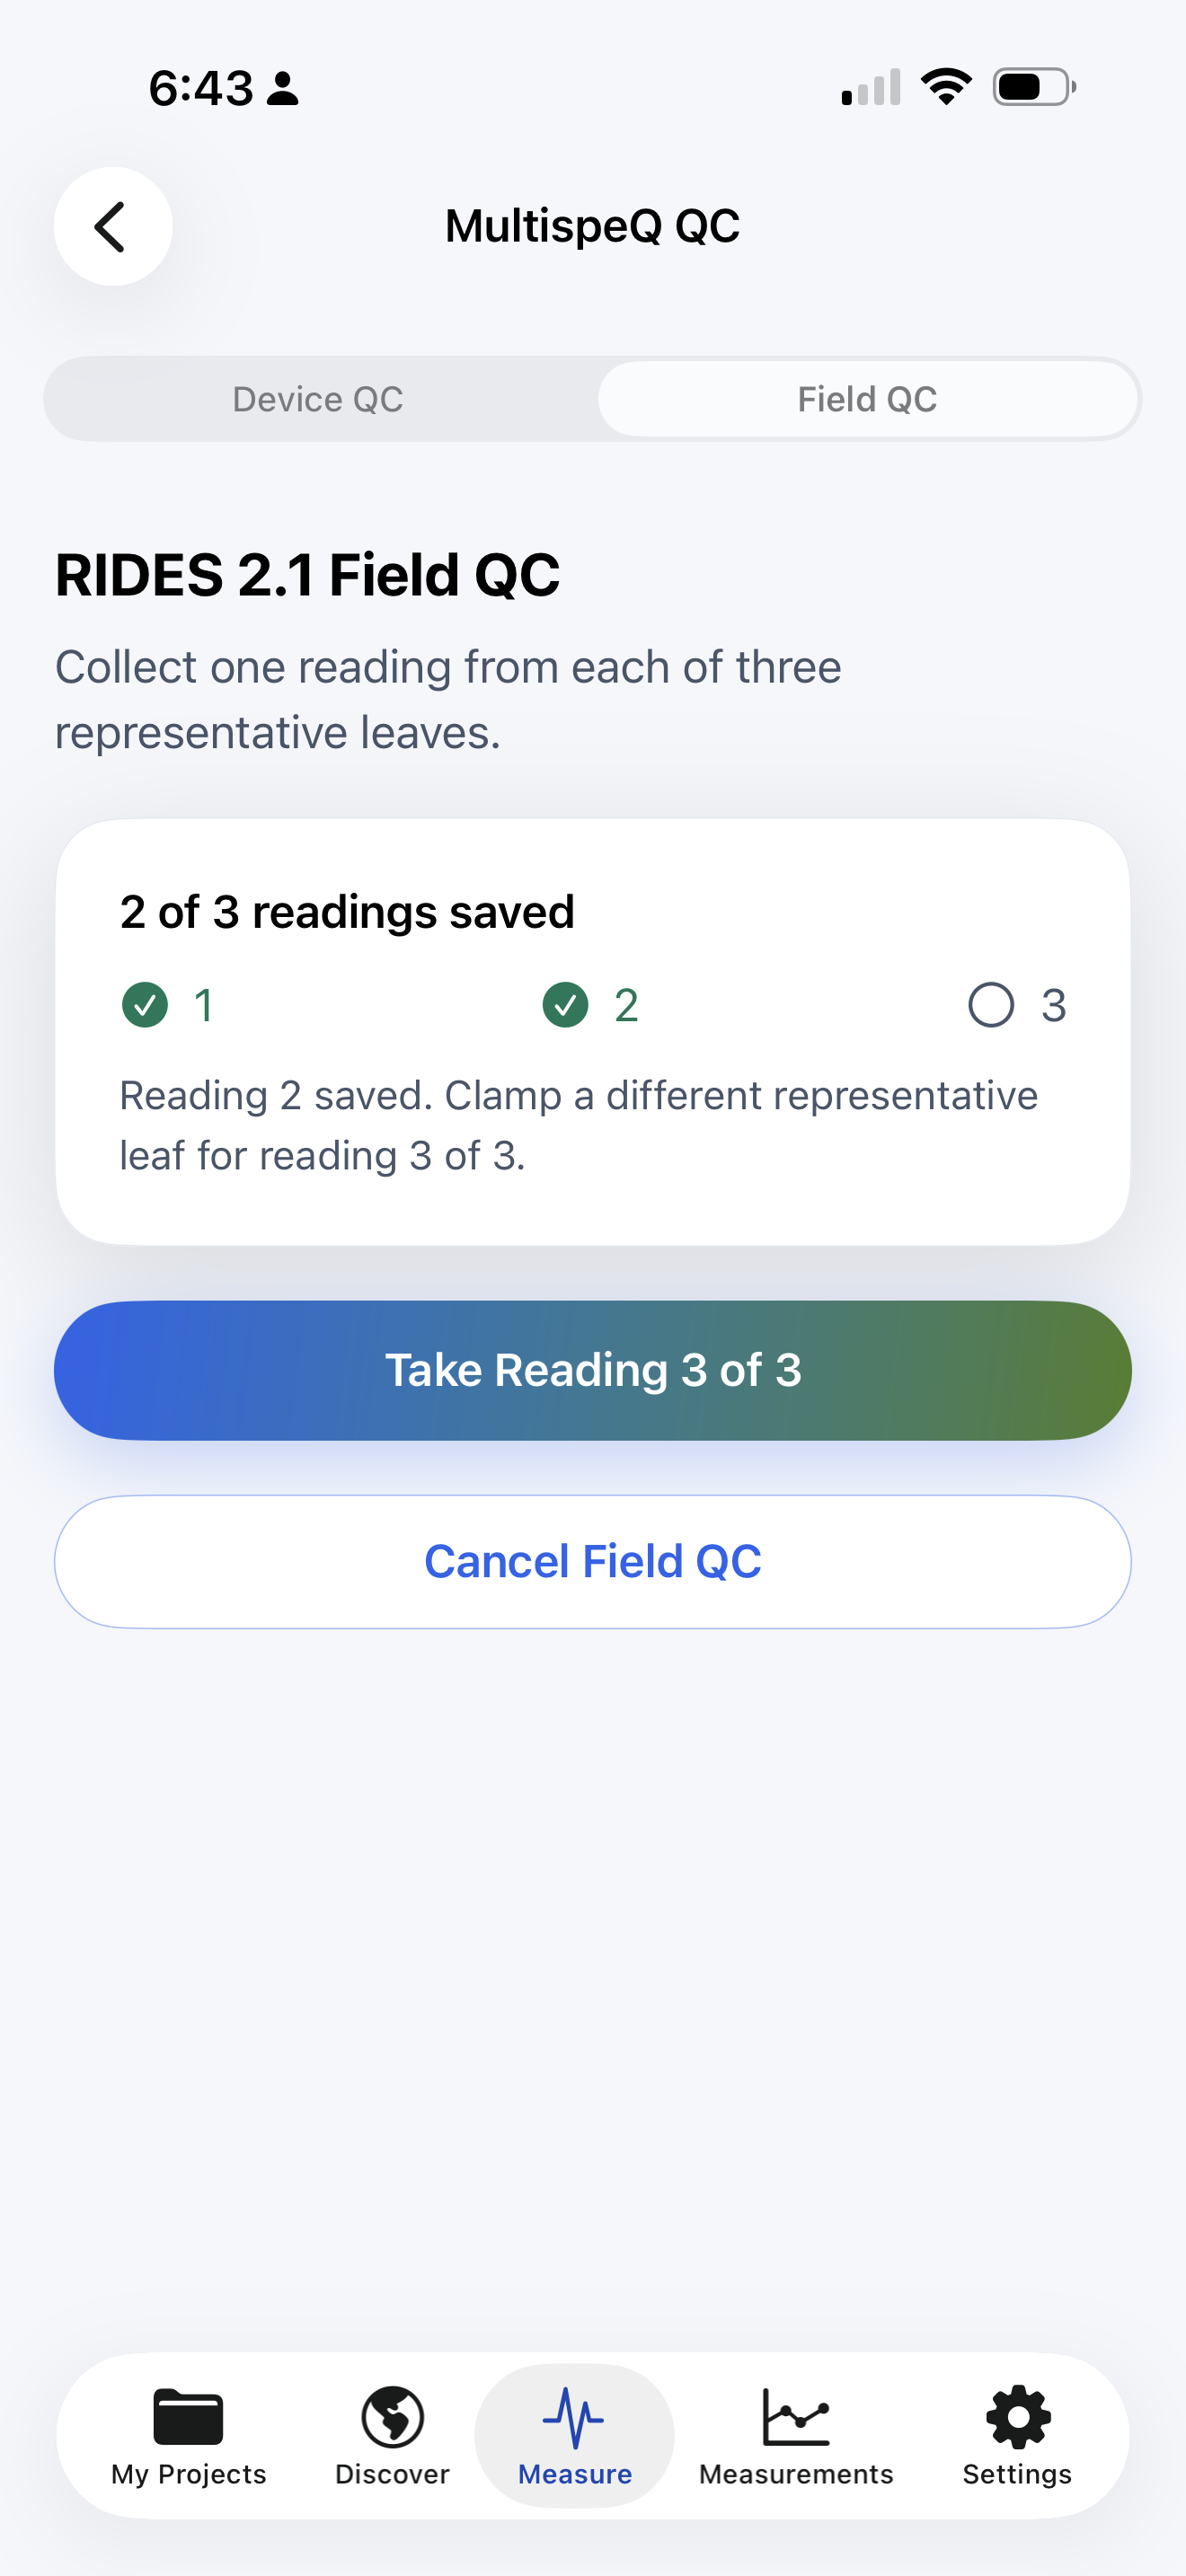
Field QC guides you through three representative leaves. The progress card shows how many readings are saved and which reading comes next. This example shows 2 of 3 readings saved, not a completed readiness check.
Open the available Field QC results and expand View traces to inspect the PAM, P700, PSI, and ECS graphs. Use Done to close the results sheet. A trace screenshot alone does not establish that all QC checks passed.
# Connection troubleshooting
- No nearby Saddle: Check Saddle power, iPhone Bluetooth, and PhotosynQ's Bluetooth permission in iOS Settings. Keep the devices close and scan again.
- Saddle connected, MultispeQ not ready: Check that the MultispeQ is powered on and its USB connection to the Saddle is secure.
- Previously used device will not connect: A Known Devices entry does not mean the Saddle is currently powered on or nearby. Check its power and rescan.
- Interrupted measurement: Restore the connection, wait for MultispeQ ready, and review the app's error before retrying. Do not treat an interrupted run as a completed measurement.
- Low Saddle battery: Charge the Saddle before continuing collection. Check the MultispeQ battery separately.