
# Projects
Projects define the protocol, questions, and collection instructions used for contributed measurements. Sign in before working with Projects.
# Project list
Select My Projects in the bottom navigation. Pull down on the list to synchronize joined Projects and refresh project and question images. The app also refreshes expiring signed image links automatically when Projects are loaded.
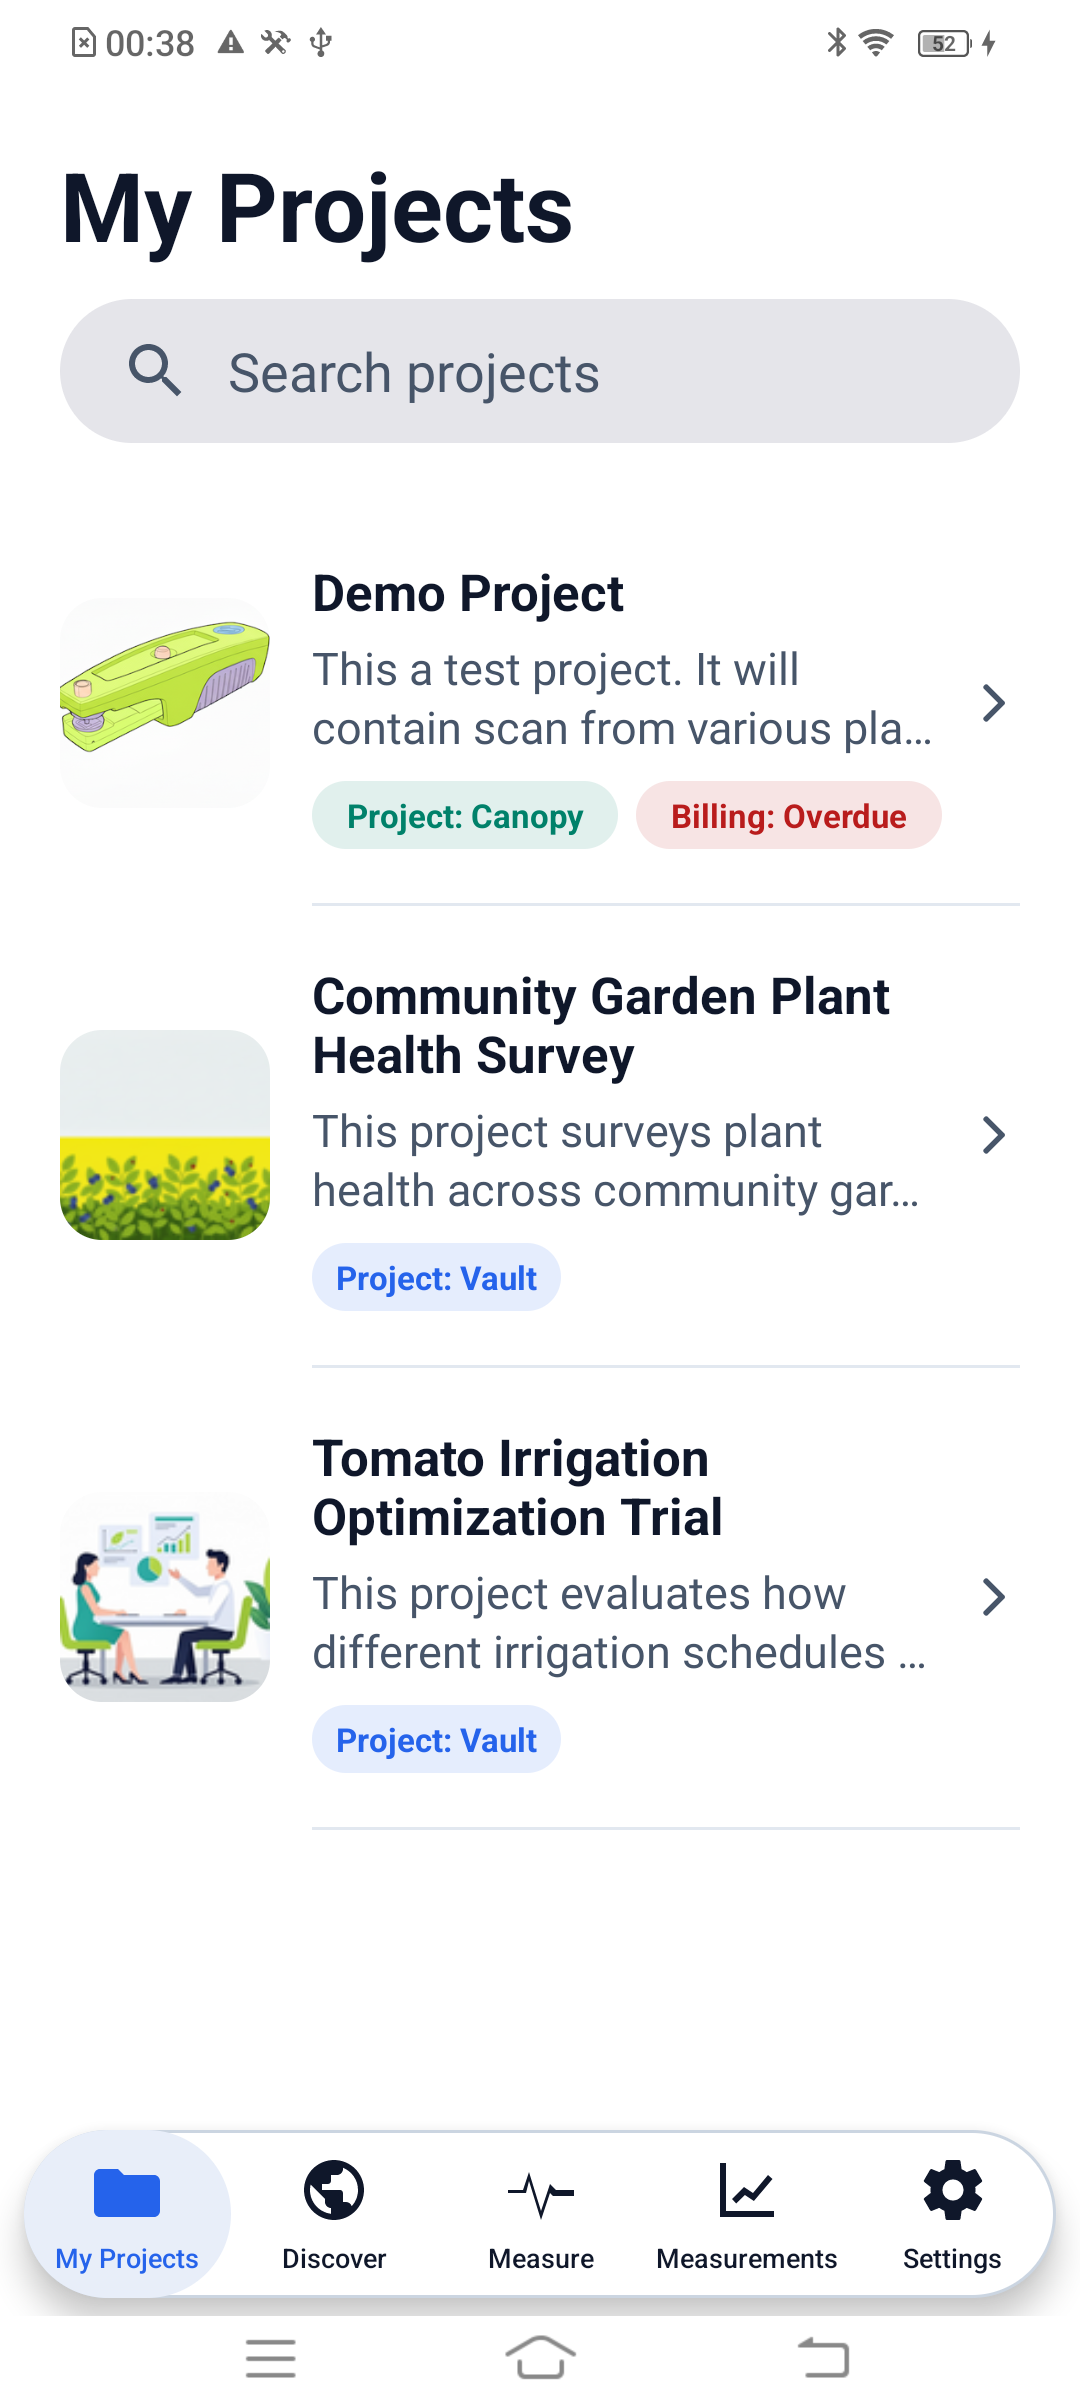
Use the search field to filter joined Projects. To find a public Project you have not joined, open Discover and request access. Private Projects require an invitation or access from the Project owner.
# Project details
Select a Project to review its image, description, instructions, and available actions.
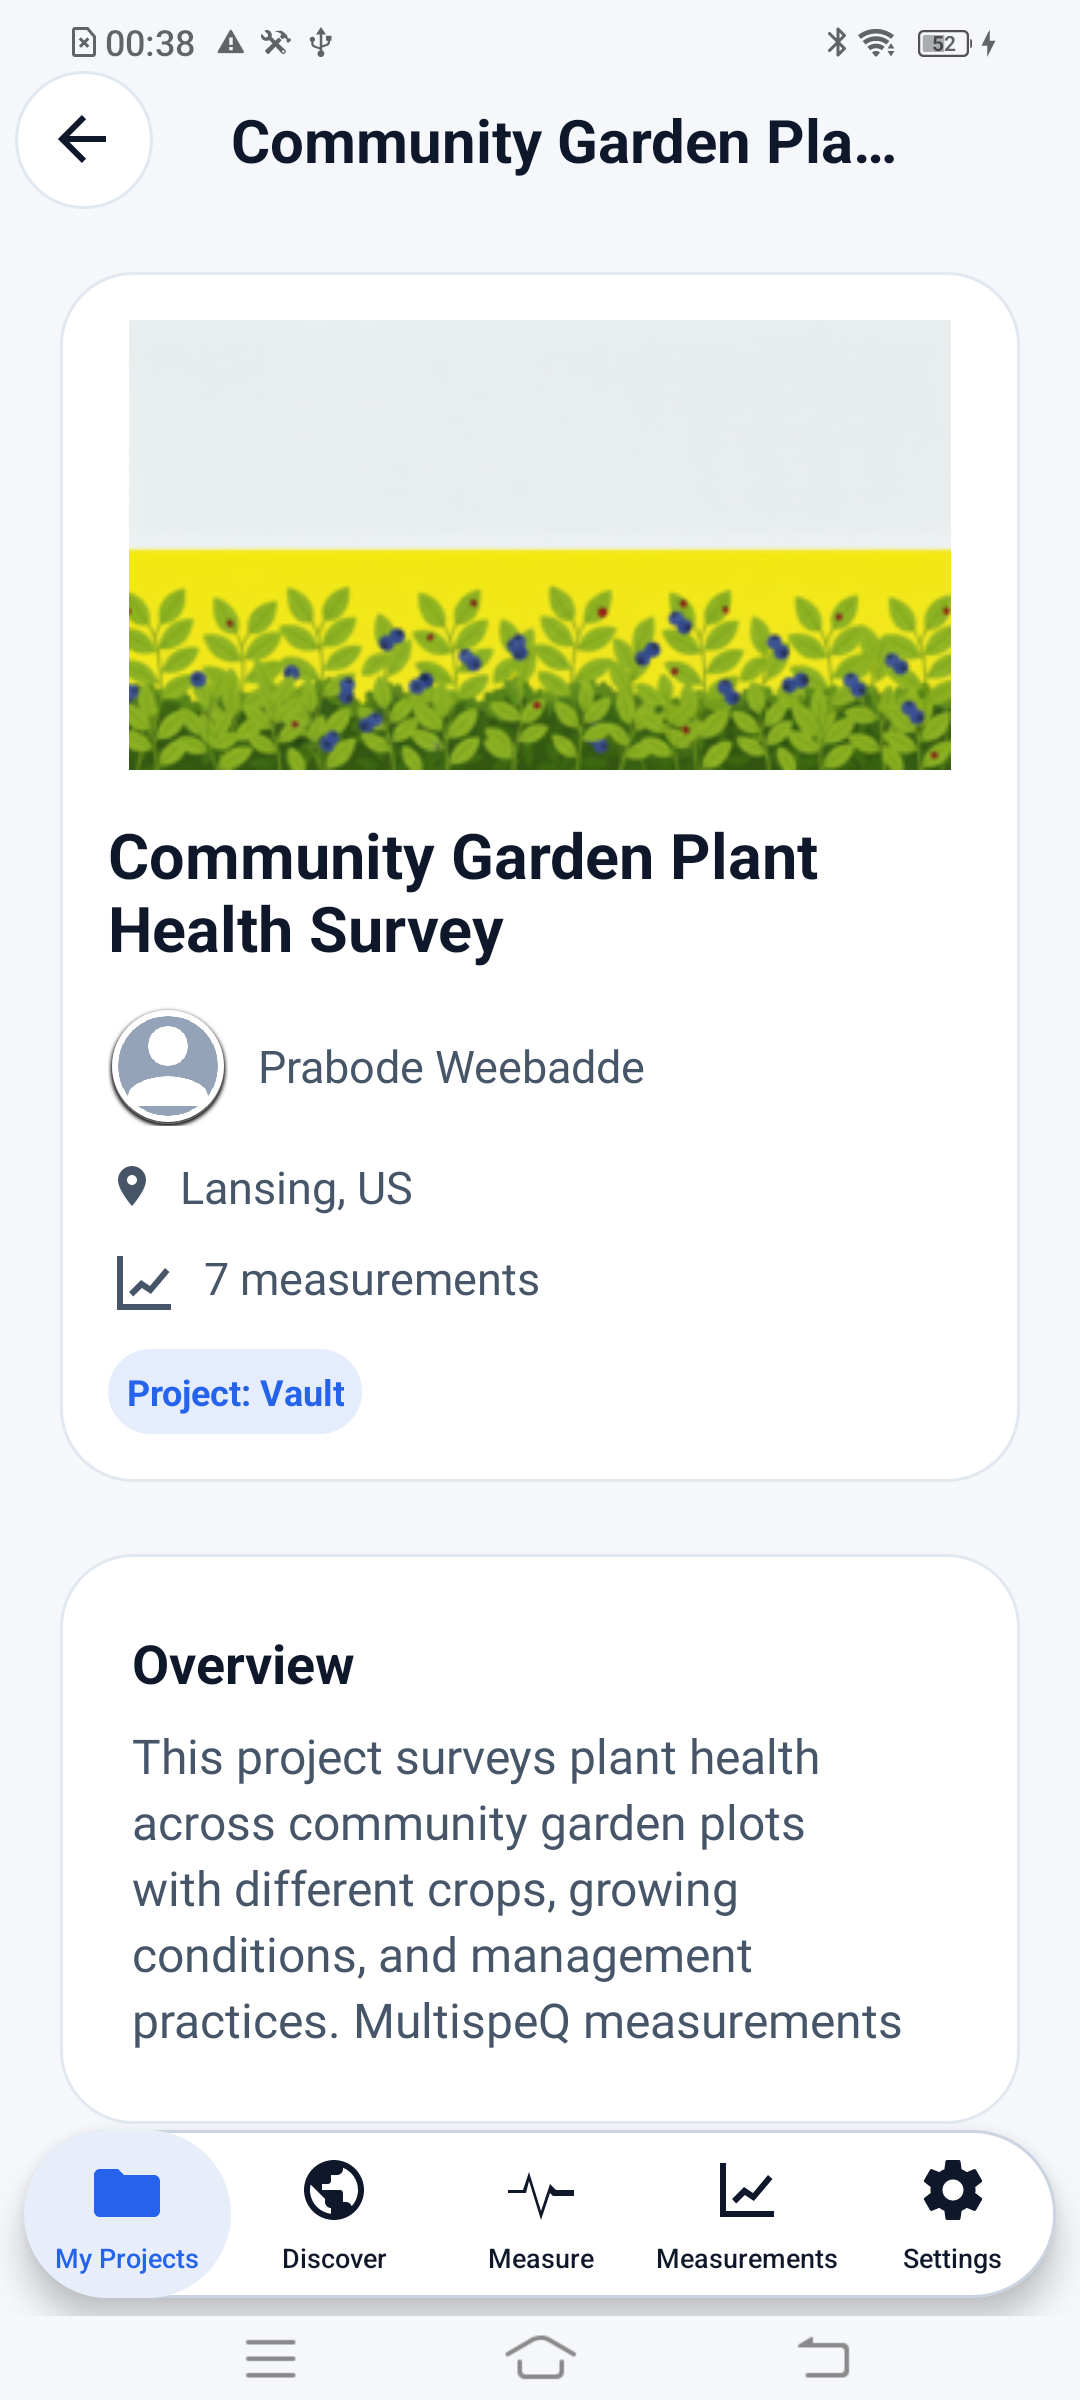
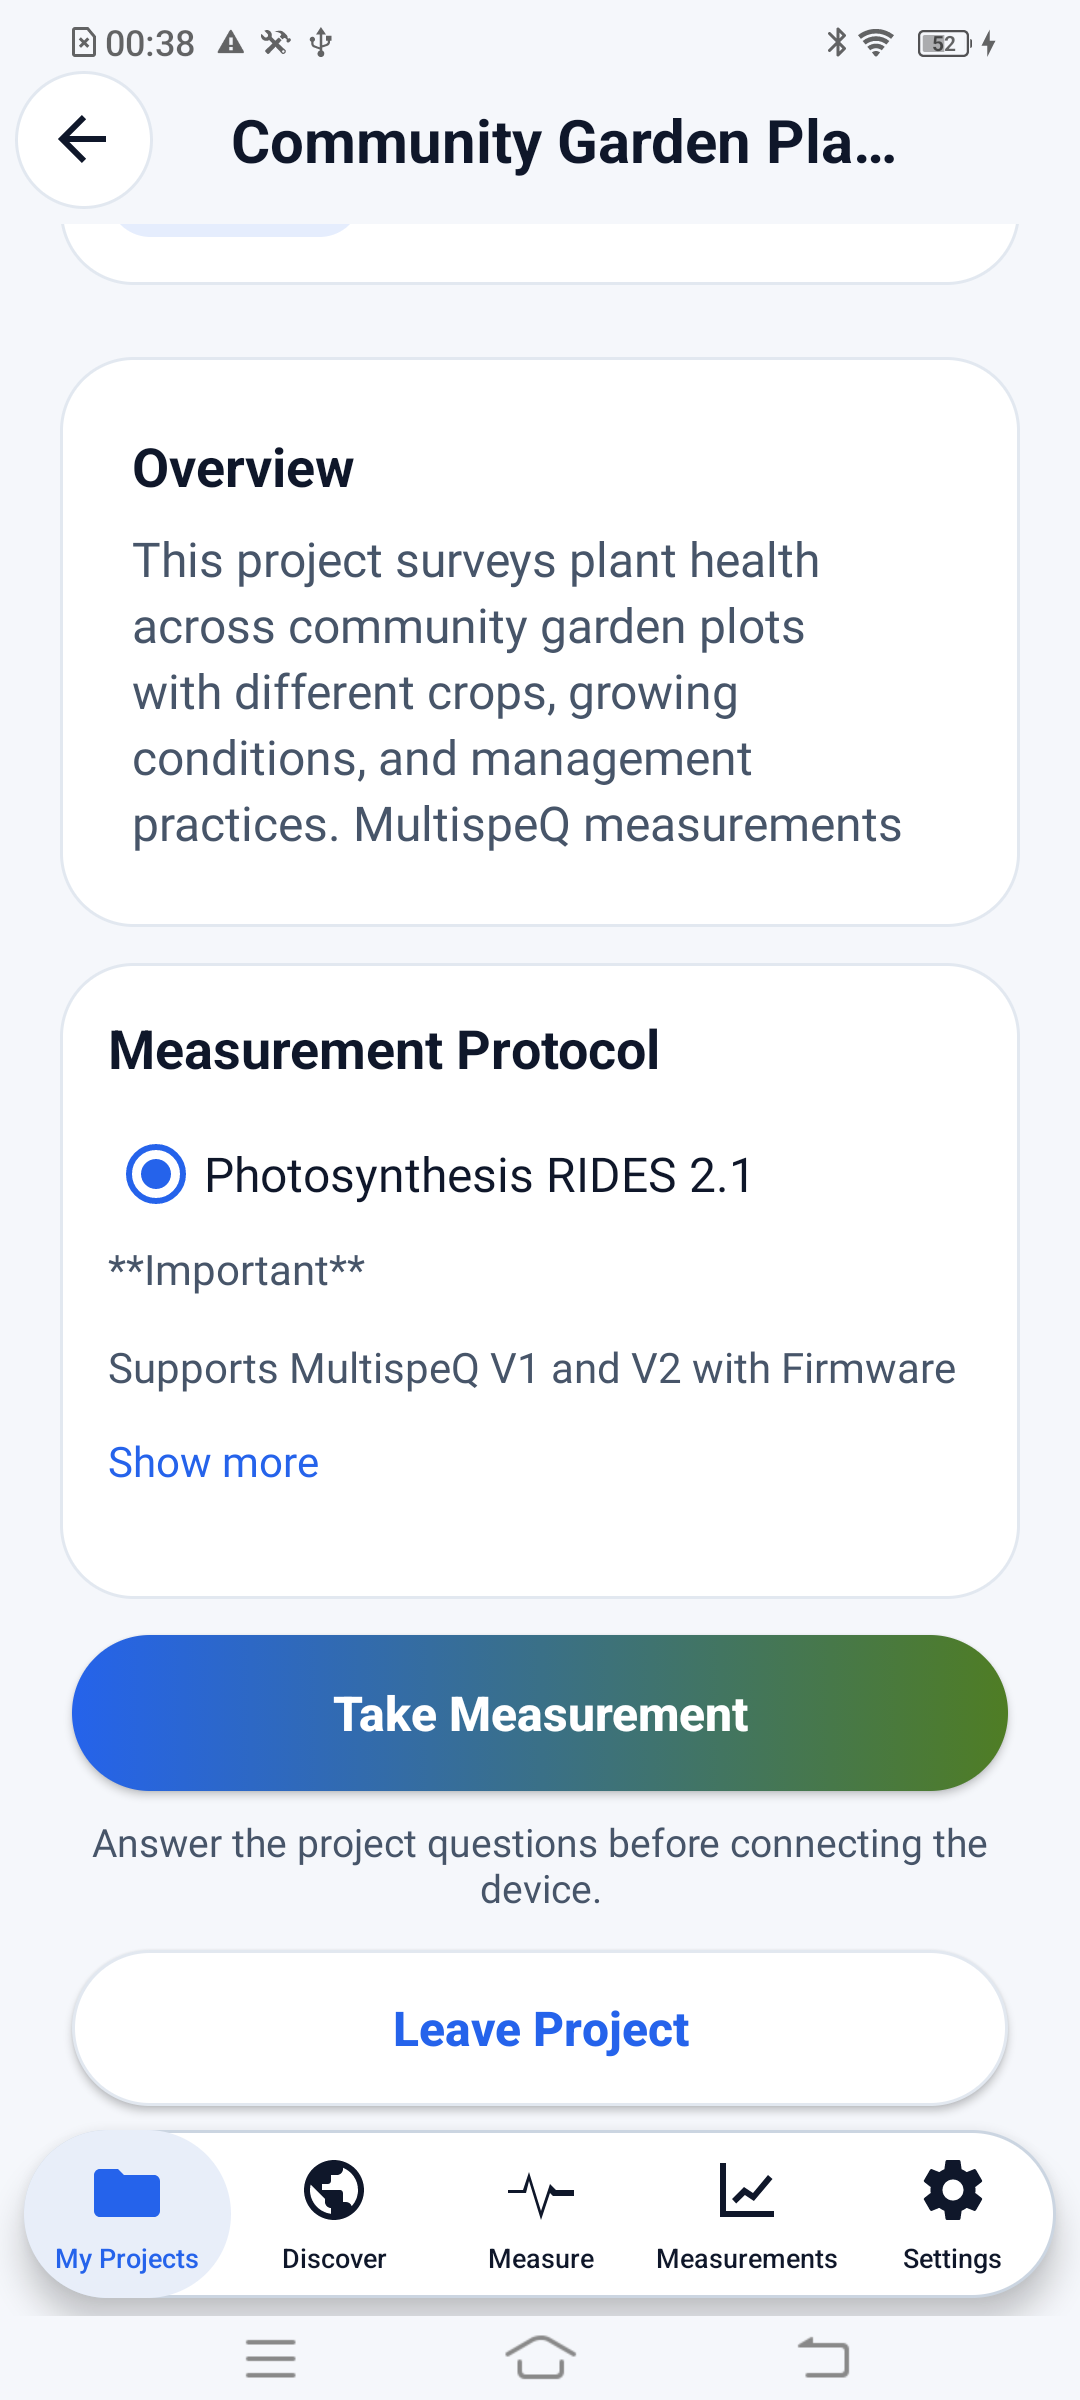
Review the Overview, Instructions, and Measurement Protocol sections. When a Project offers more than one protocol, select the one required by the collection plan before measuring.
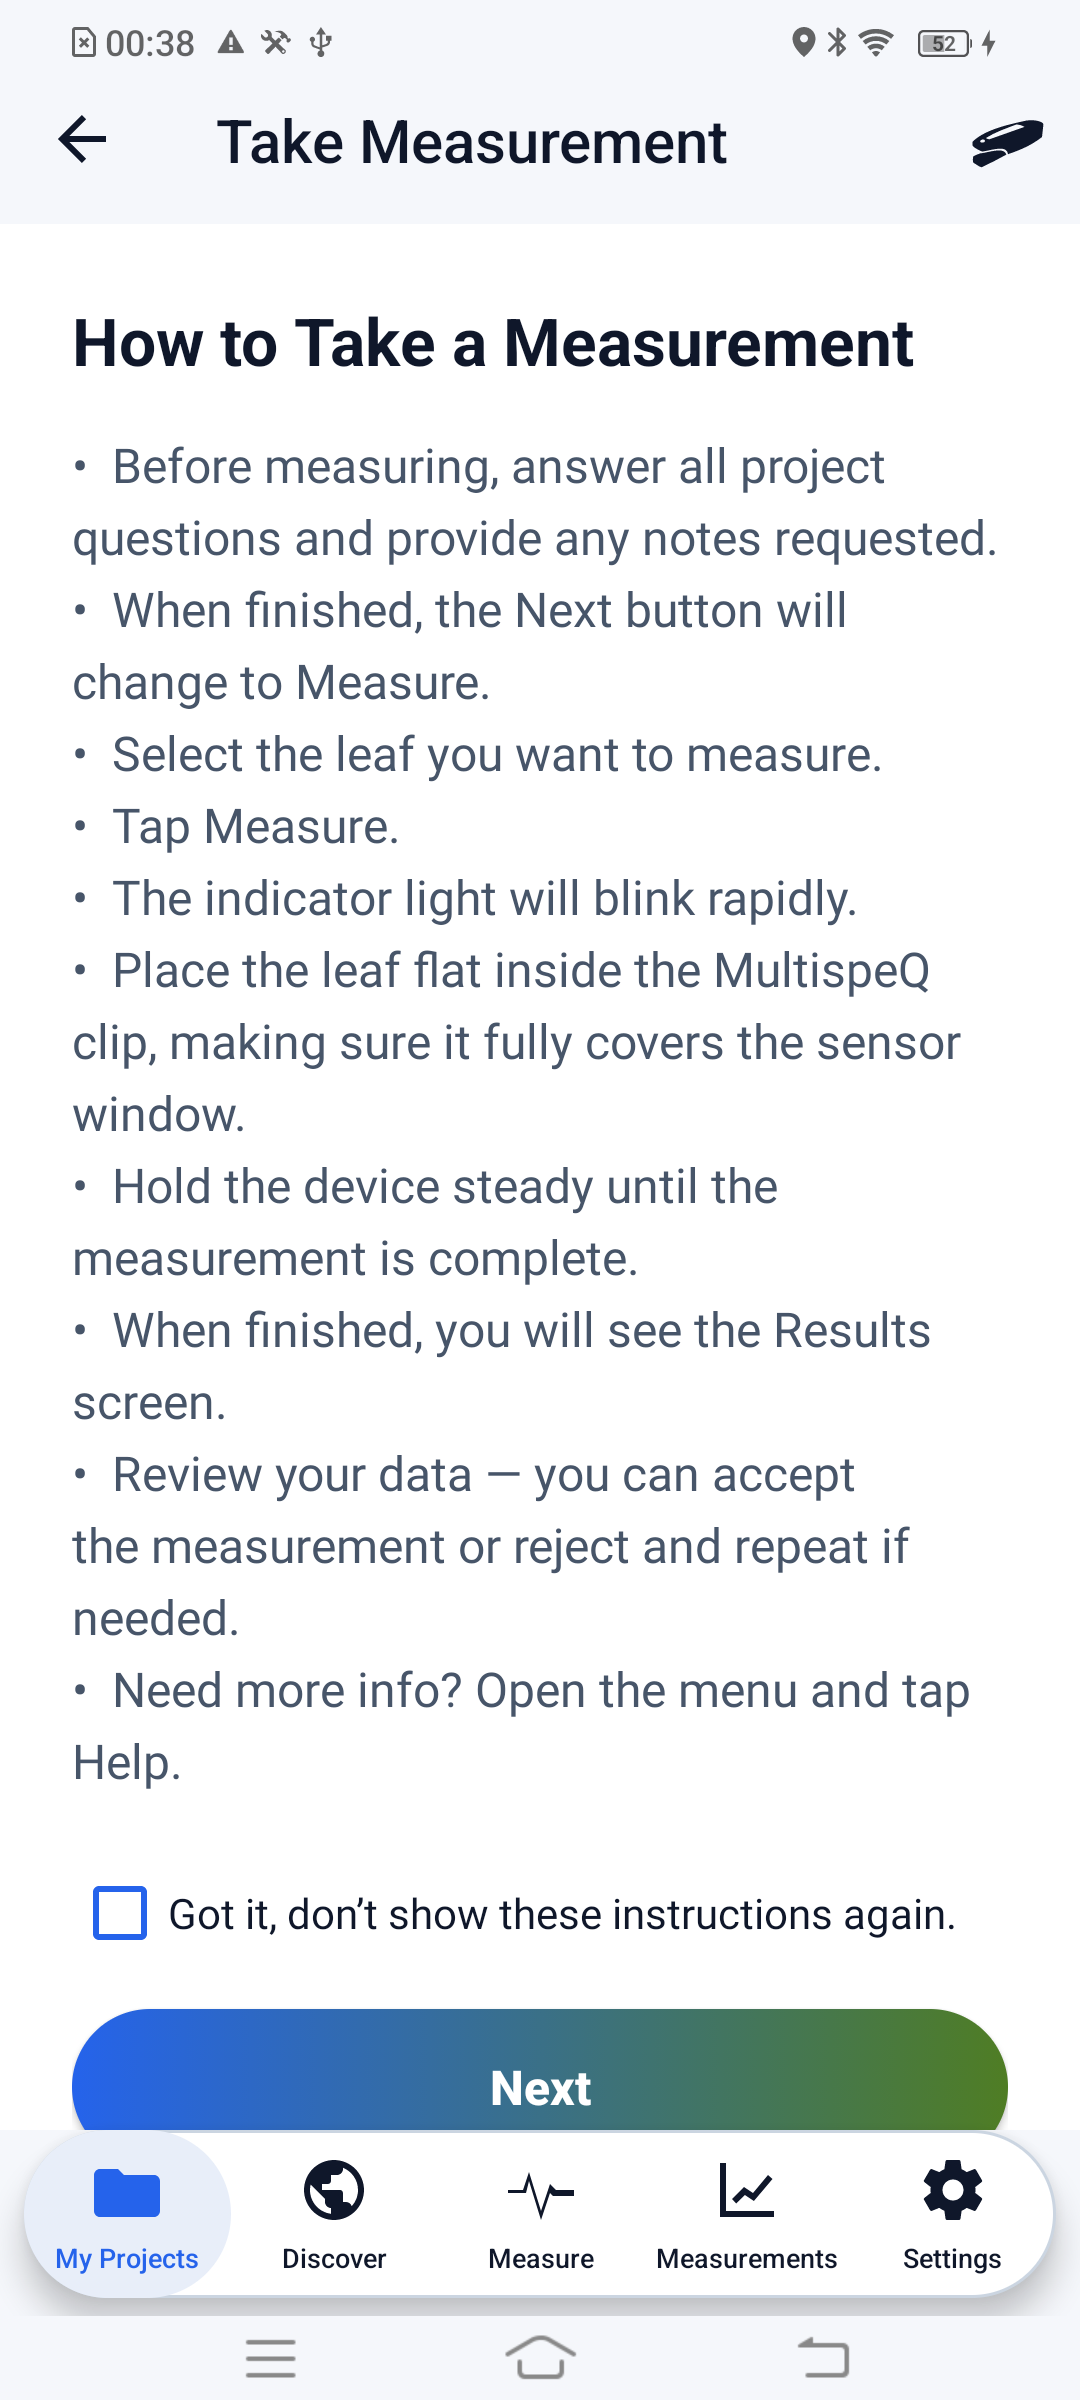
The measurement instructions appear before the question and instrument steps. Read them before placing the sample.
- Take Measurement starts the Project collection workflow.
- Leave Project asks for confirmation before removing the Project from your joined list.
- Show more expands longer descriptions or instructions where available.
# Answer Project questions
After selecting Take Measurement, complete every required question. Connect a MultispeQ before starting the instrument reading if one is not already connected.
Depending on the Project, a question may provide:
- A list of text choices.
- Image choices.
- A text or numeric input.
- A barcode or QR-code scanner.
- A photo attachment.
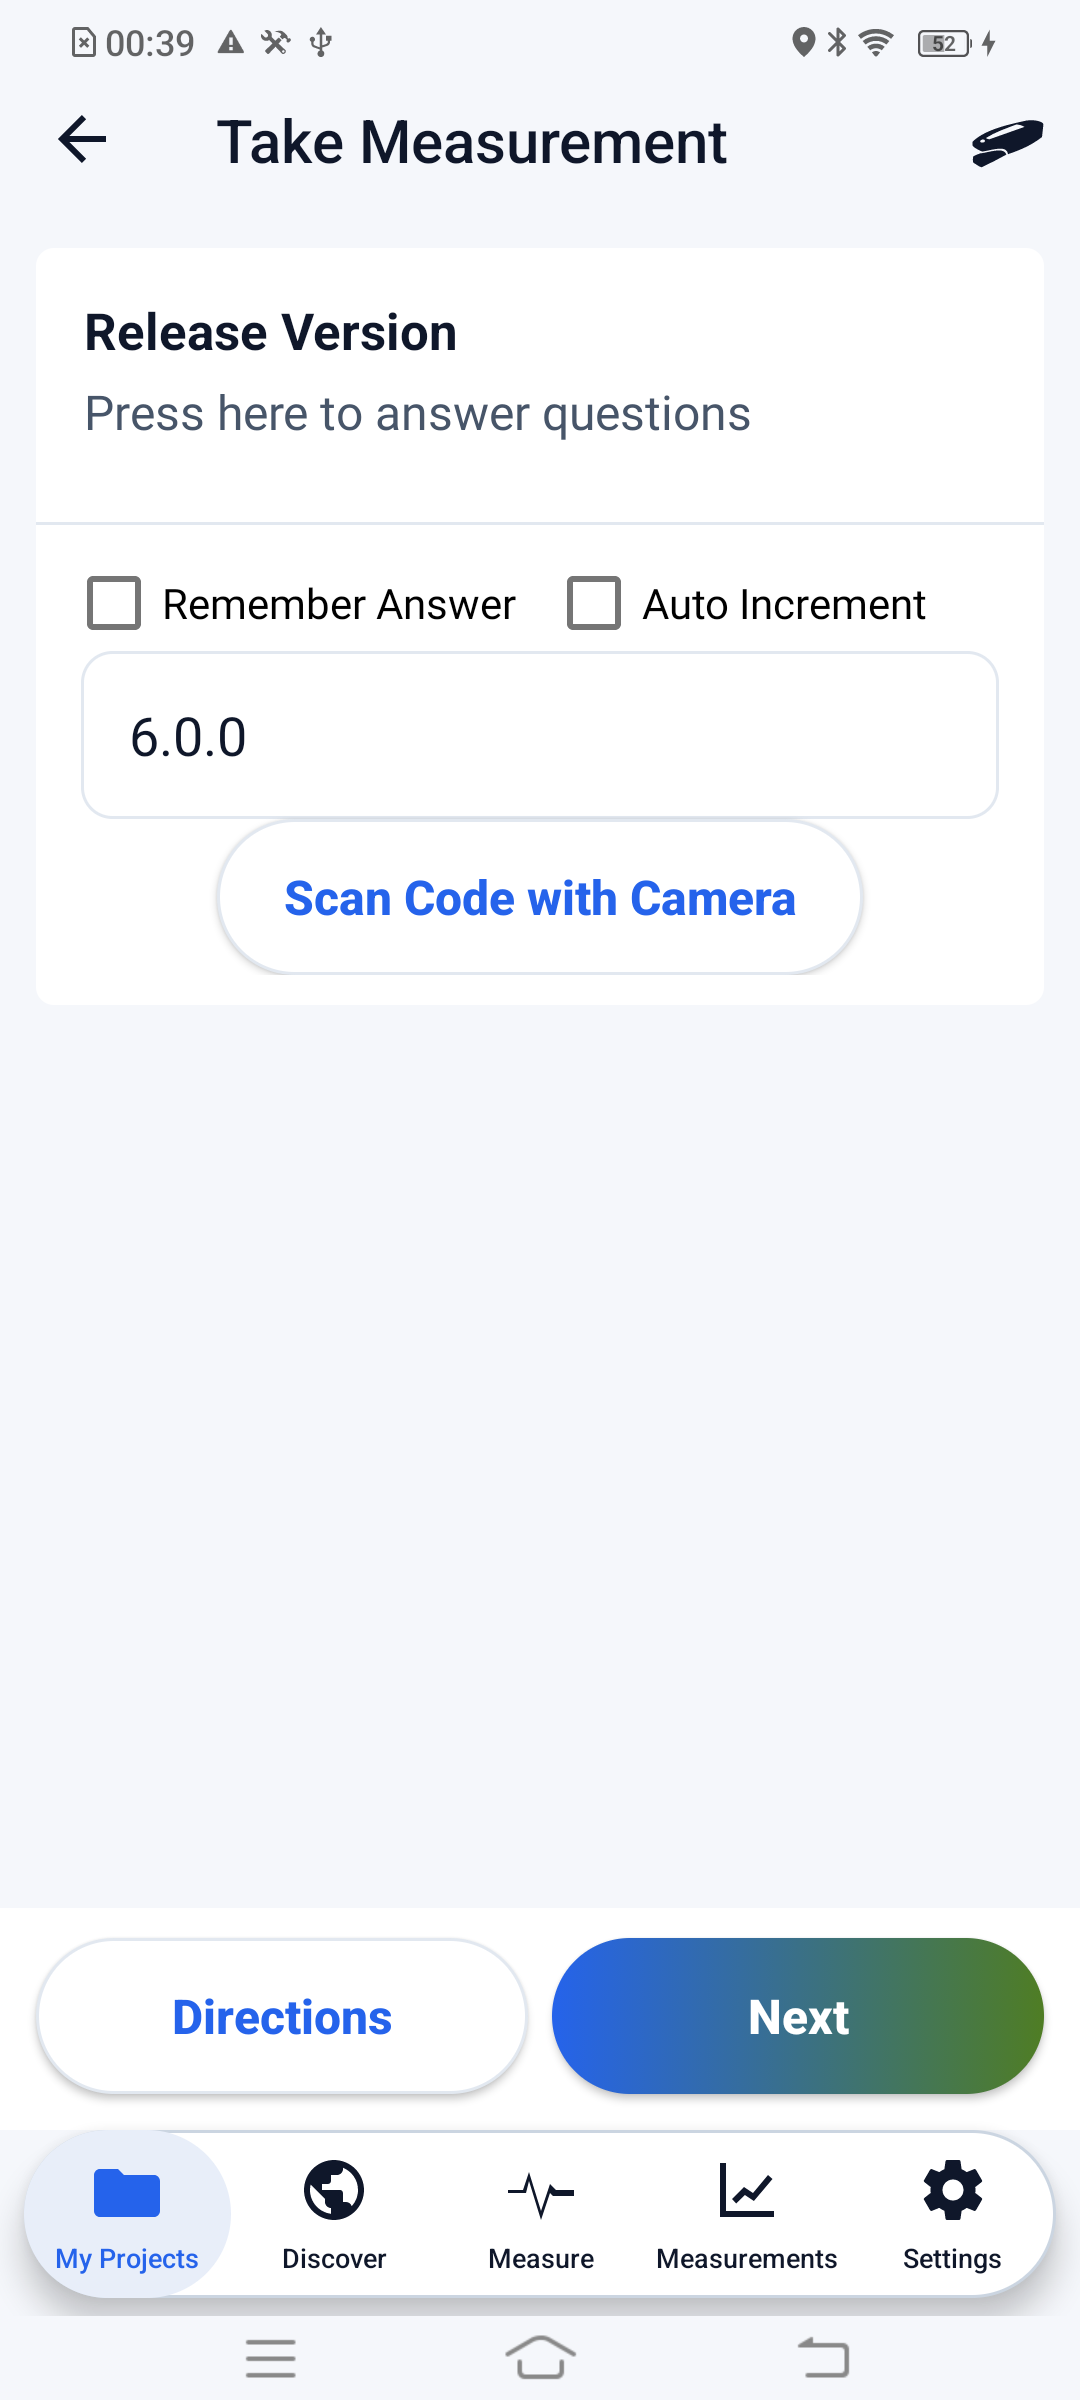
Use Remember Answers for values that should remain the same across several measurements. Use Auto Increment only when the Project's numeric or ordered answers were designed for that workflow.
For barcode questions, select Scan Code with Camera, point the camera at the barcode or QR code, and confirm the detected value. For image-choice questions, select the image and label that represent the sample.
# Take and review a measurement
- Confirm the correct MultispeQ is connected.
- Answer all required Project questions.
- Position the sample as required by the Project protocol.
- Select Take Measurement. Some protocols begin immediately; others wait for the clamp to open and close.
- Keep the leaf and instrument steady until the measurement finishes.
- Review the compact Measurement Result card and any warnings. Expand More values or View traces as needed, or open Raw Data to inspect the JSON. See Review a measurement for screenshots.
- Select Accept and Save to store the measurement, Retake Measurement to try again with the same selected protocol and answers, or Discard Reading to return to the questions without saving that reading.
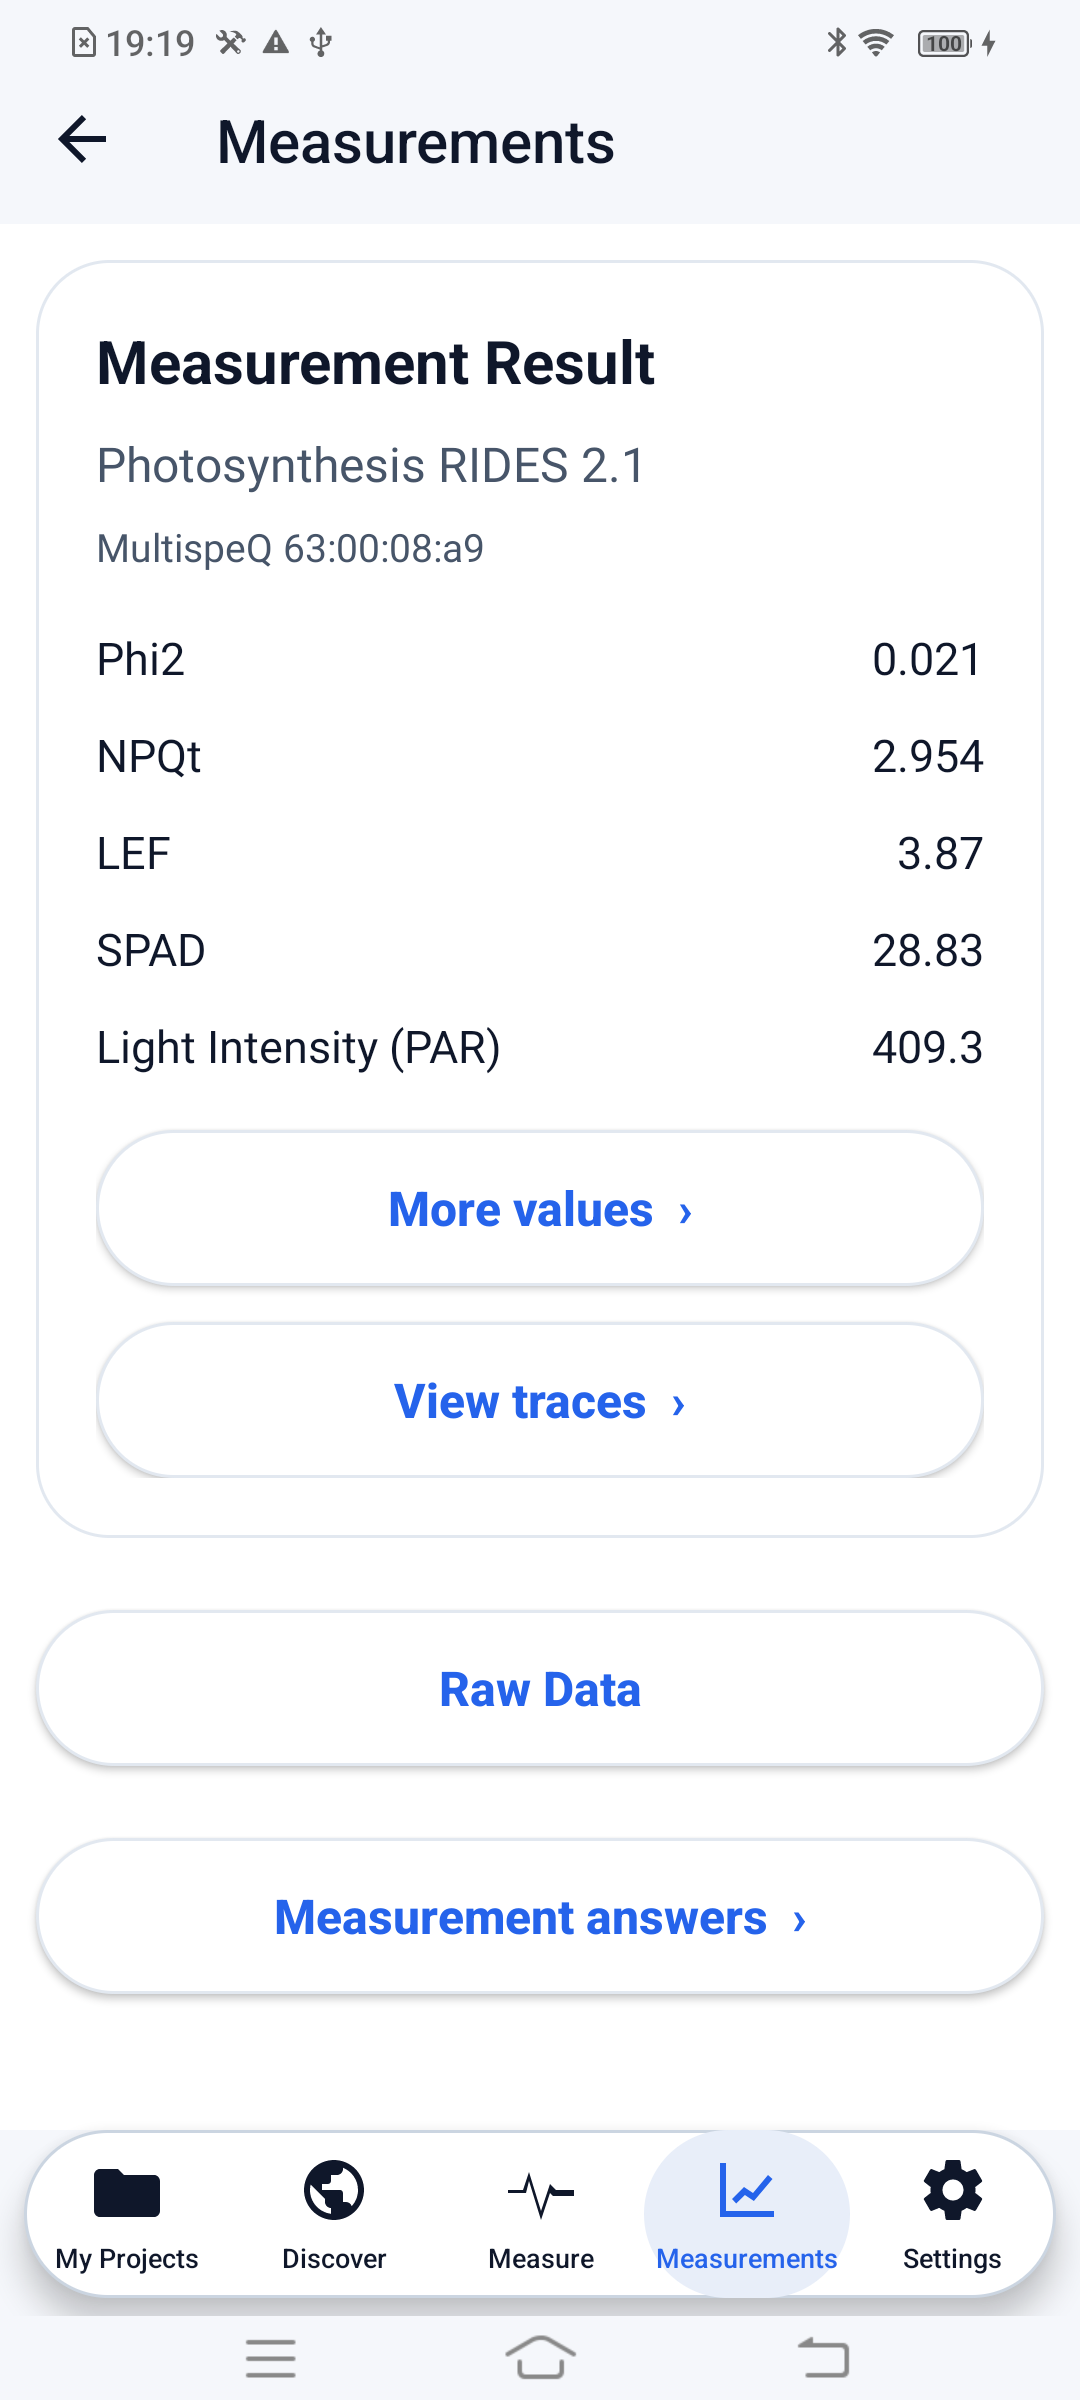
This screenshot shows a saved Project reading. A new Project reading also offers the acceptance actions described above; Quick Measurements use the same result card and are saved locally when complete.
Accepted measurements appear under Measurements. Depending on Settings, they are uploaded automatically or remain pending until Upload All is selected.
Protocol start behavior
Know how the Project protocol starts before positioning the leaf. Photosynthesis RIDES protocols normally wait for the clamp sequence, while other protocols may start immediately.