
# MultispeQ v2.5 and v2.0
MultispeQ v2.5 and v2.0 use the same setup, operation, application, Protocol, Macro, QC, cleaning, and maintenance workflows. Both instruments combine PAM-style chlorophyll fluorescence, absorbance-based spectroscopy, environmental sensing, and PhotosynQ-connected data collection in a portable leaf-clamp design.
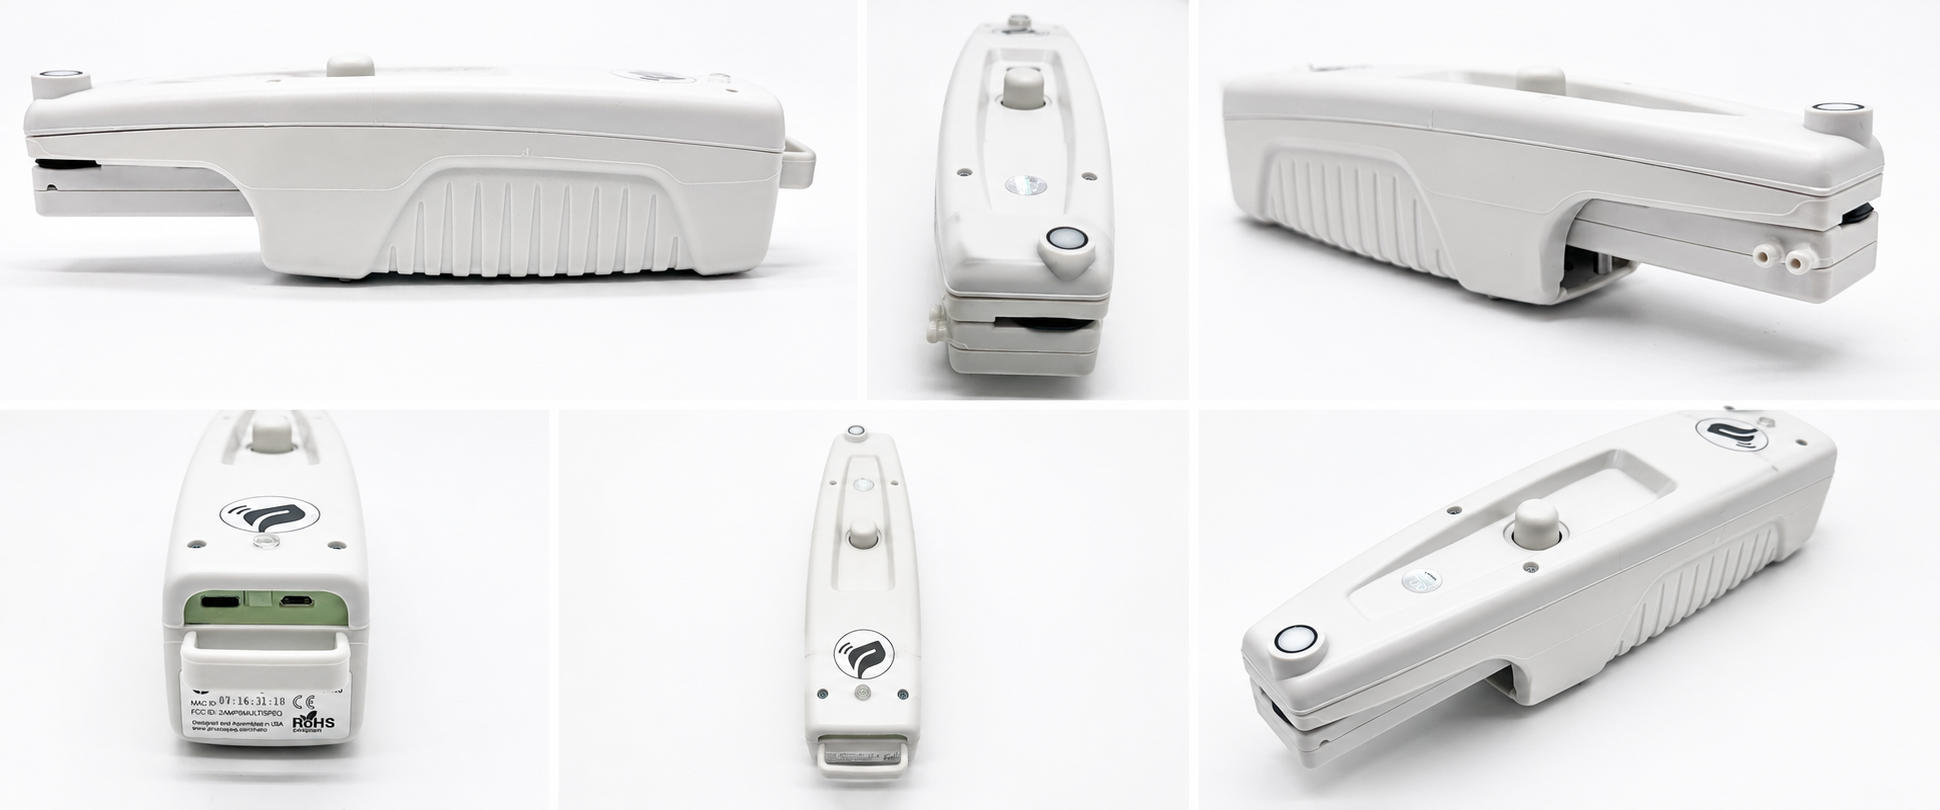
The images on this page show MultispeQ v2.5. Control locations and operating instructions also apply to MultispeQ v2.0 unless specifically noted. The measurement parameters returned depend on the selected Protocol and its analysis Macro.
# What Changed in v2.5
MultispeQ v2.5 builds on the complete v2.0 feature set with the following upgrades:
- Updated optical channels at 730 nm, 820 nm, 850 nm, and 950 nm
- Updated amber and NeoPixel LEDs
- Improved light guides for better optical consistency
- Enhanced infrared measurement capabilities
- Gold Standard QC transparency to improve confidence in instrument consistency and field data
These updates are intended to improve repeatability and confidence while retaining the established MultispeQ v2.0 measurement workflow and capabilities.
Configuration Note
MultispeQ v2.5 includes all v2.0 features with updated LEDs and optical components. Use v2.5 specifications when servicing or replacing optical parts.
# Getting Started
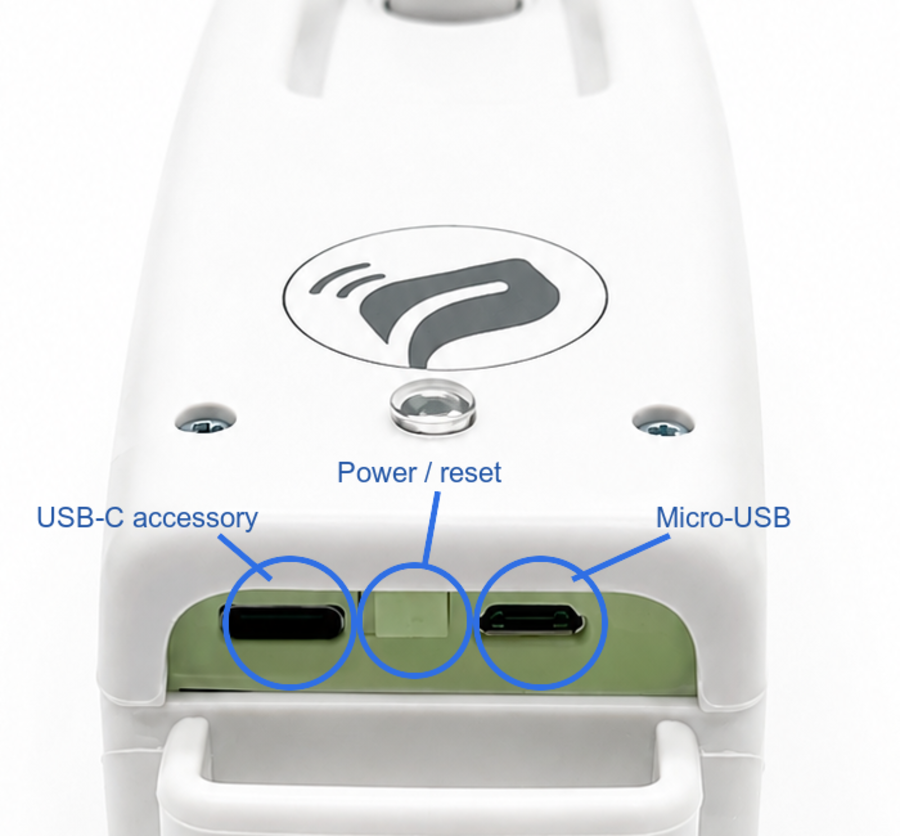
- Charging: Before using your MultispeQ, charge it for 8 hours using the supplied micro-USB cable. When plugged in, the small green LED next to the micro-USB port lights up. Once the instrument is fully charged, the light turns off.
- Turn On: Press and hold the power/reset button in the rear for 5 seconds.
- Software: Install the Android application or a supported desktop application.
- Quality Control: Run MultispeQ QC before collecting research data.
The power supply is not included. Use a computer or standard USB power supply. Charging time depends on the power output of the power supply.
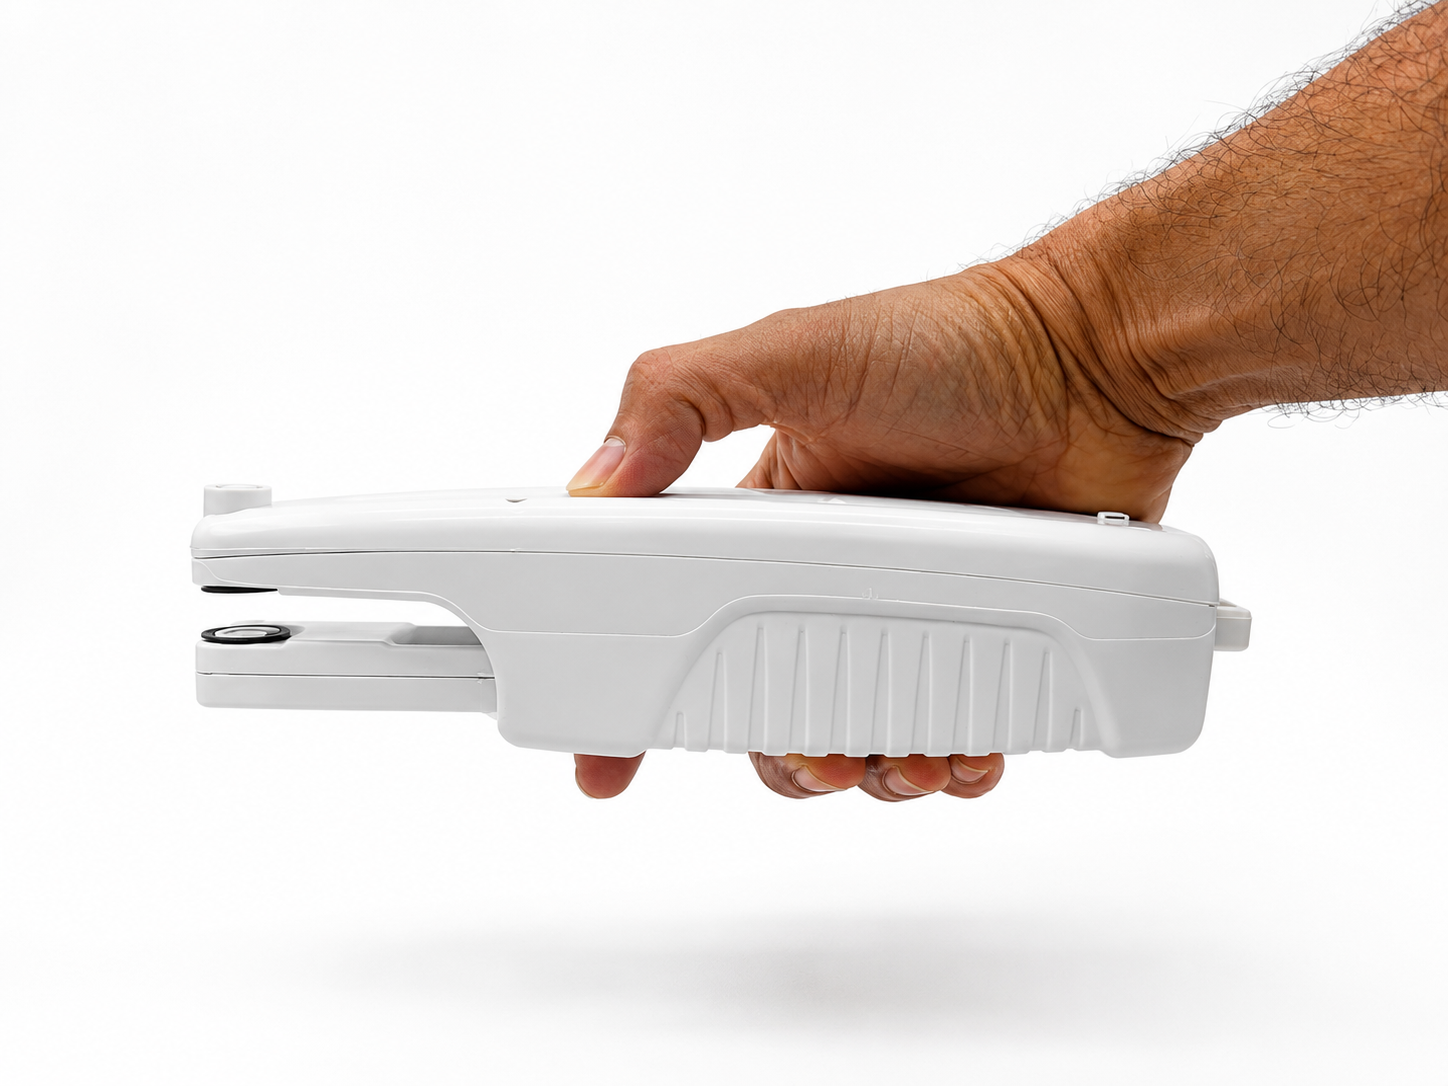
For complete setup and connection instructions, see Using the MultispeQ.
# About
# Leaf Clamp Button
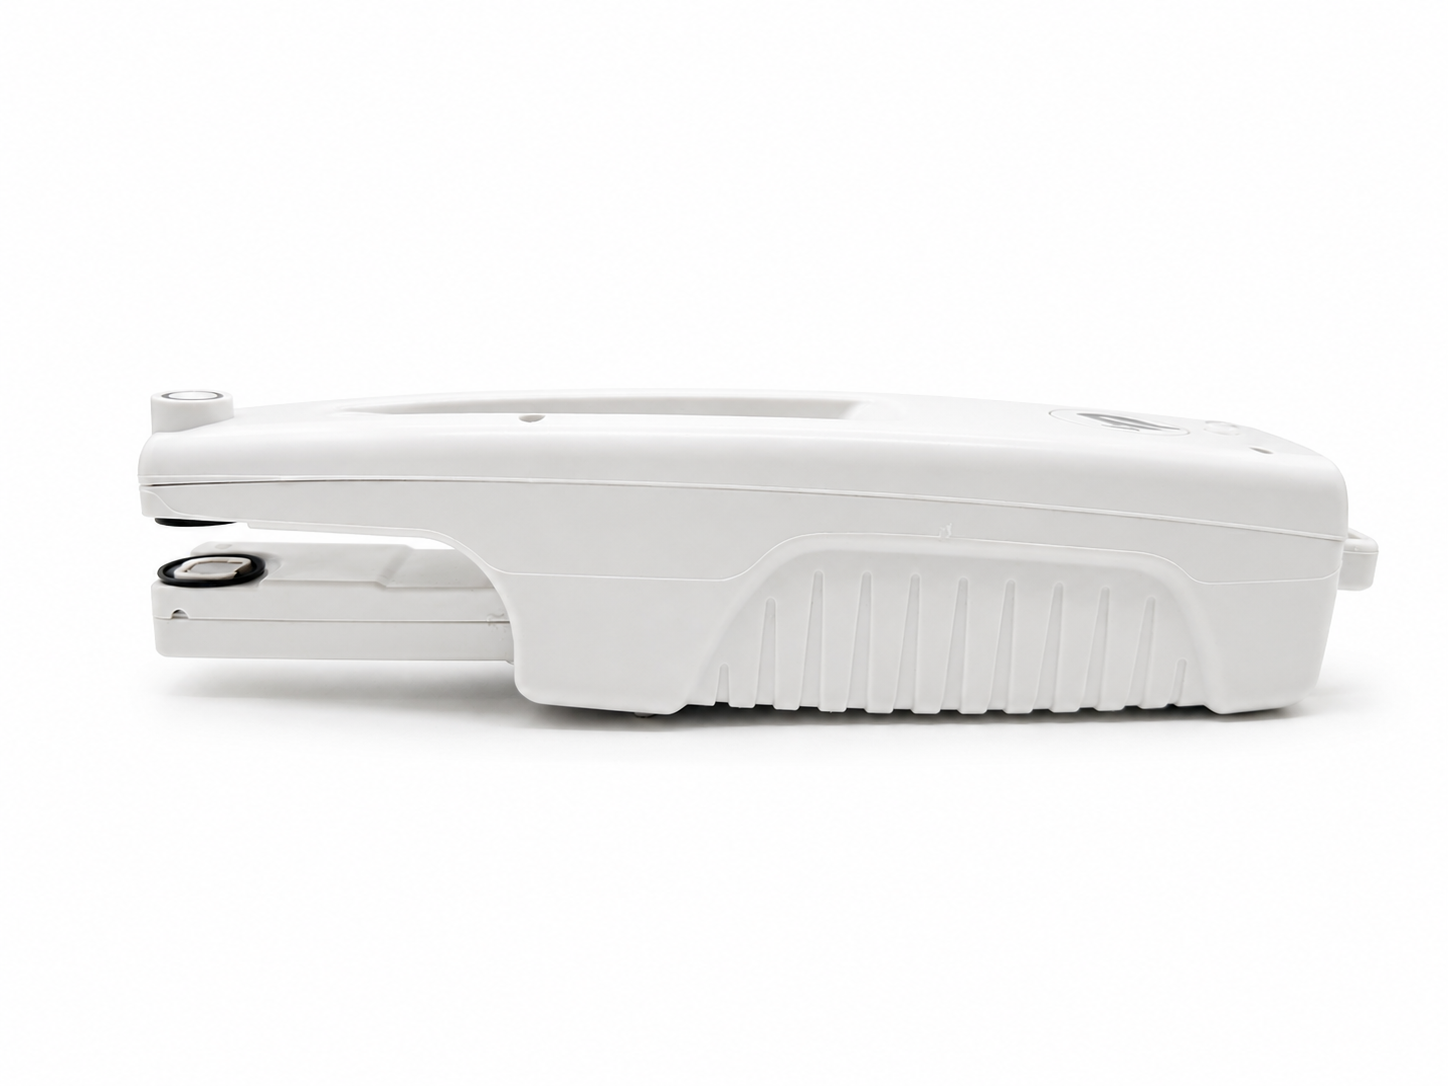
Push down the leaf clamp button to open the leaf clamp. Push and release it with an even motion to prevent it from snapping back. If opening and closing feels rough, a small amount of lithium grease can be used to make the motion smoother.
# PAR Sensor
The PAR sensor is located on top of the instrument. Depending on the measurement Protocol, the measured light intensity is replicated inside the instrument. Keep the PAR sensor clean, uncovered, and unshaded to prevent altering the measured intensity.
# Seal
The nitrile seal around the light guides on the main body and clamp seals the measurement area from outside light.
# Light Guides
The light guides are made from acrylic. Keep them clean and do not clamp hard or rough materials that could cause scratches.
TIP
Clean the light guides with a clean, soft microfiber cloth. A slightly damp cloth can be used when needed.
WARNING
The instrument is not water-resistant or waterproof. Do not use it in wet conditions or submerge it in water. Do not use solvents, detergents, abrasive cleaners, or rough cloths on the light guides.
For small leaves or samples that do not completely cover the measurement area, see Light Guide Mask.
# IR Contactless Temperature
The contactless IR sensor measures leaf temperature. Ensure the leaf covers the IR sensor during a measurement. The sensor sits inside a small groove and is not flush with the clamp surface. The leaf or other material should not touch the sensor because contact can alter the temperature reading.
# Temperature and Relative Humidity Vents
The two vents allow air exchange inside the instrument. Two environmental sensors are located inside the clamp: one near the vents and light guide, and one near the opposite end. Tubes can be attached and used with a pump to provide constant airflow or gas exchange.
# Instrument Action Indicator
| Indicator | Function |
|---|---|
 | Instrument is on and fully charged. The indicator flashes periodically. |
 | Instrument is on and the battery is discharging. The indicator flashes periodically. |
 | The clamp is open. The indicator flashes rapidly. |
 | The instrument is busy, such as during a measurement. The indicator remains on. |
# Power/Reset Button
The button at the rear turns on and resets the instrument.
- Hold the button for at least 5 seconds to turn on the instrument. Wait for the Action Indicator to flash, confirming that startup is complete.
- Briefly press the button to reset the instrument if a Protocol stops responding.
- While the instrument is running, hold the button for 5 seconds to restart it. Wait for the Action Indicator to flash again.
TIP
Press the power button only through its protective silicone covering.
# Micro-USB
The micro-USB port charges the instrument and provides data transfer when connected to a computer. When unplugging the cable, pull it straight out without bending it up or down to avoid damaging the instrument connector.
# Accessory Port
The USB-C port supports accessory equipment. When unplugging an accessory cable, pull it straight out without bending it up or down.
# Charge Indicator
The small LED at the rear indicates that the instrument is charging. It turns off when the battery is fully charged.
# Measurement Capabilities
Depending on the selected Protocol, MultispeQ v2.5 and v2.0 can collect:
- PAM-style chlorophyll fluorescence measurements
- Absorbance-based spectroscopy measurements
- Relative chlorophyll and photosynthetic parameters calculated by a Macro
- Environmental measurements such as light, temperature, relative humidity, and pressure
- Instrument orientation and other supporting sensor data
Always confirm that a Protocol supports the instrument model and installed firmware before collecting research data.
# Configuration
| Body | Measurements |
|---|---|
| Size | 224.2 mm x 53.6 mm x 56.6 mm (length, width, height) |
| Total Weight | 340 g, including battery |
| Light Guide Surface | 8 mm x 8 mm (64 mm²) |
| Leaf Clamp Opening | 13 mm |
| Safety | Ring for leash |
| Updates | Firmware updates through PhotosynQ applications |
# Lights
Both versions have sets of five measurement LEDs on the main body and leaf clamp. MultispeQ v2.5 updates the amber, 730 nm, 820 nm, 850 nm, and 950 nm optical components while retaining the established v2.0 channel arrangement.
# Main Body
| Channel | Emission Peak | Color/Range |
|---|---|---|
| 1 | 530 nm | Green |
| 2 | 655 nm | Red |
| 3 | 590 nm | Amber, updated in v2.5 |
| 4 | 448 nm | Blue |
| 5 | 950 nm | Near infrared, updated in v2.5 |
# Leaf Clamp
| Channel | Emission Peak | Color/Range |
|---|---|---|
| 6 | 950 nm | Near infrared, updated in v2.5 |
| 7 | 655 nm | Red |
| 8 | 850 nm | Near infrared, updated in v2.5 |
| 9 | 730 nm | Far red, updated in v2.5 |
| 10 | 820 nm | Near infrared, updated in v2.5 |
# Detectors
The instrument has two detectors: one covering the near-infrared range on the main body and one covering the visible range on the leaf clamp.
| Channel | Detection Range | Model |
|---|---|---|
| 1 | 700 nm - 1150 nm | Hamamatsu S6775-01, main body |
| 3* | 400 nm - 700 nm | Hamamatsu S6775, leaf clamp |
*Detector 3
Detector 3 is covered with a BG-18 band-pass filter centered near 493 nm. Signals near the edges of its detection range are expected to be weaker.
# Sensors
MultispeQ v2.5 and v2.0 use the same environmental and instrument sensor configuration.
| Sensor | Model |
|---|---|
| Ambient temperature, humidity, and pressure (2x) | Bosch BME280 |
| Contactless temperature | Melexis MLX90615SSG-DAG-000-TU |
| Accelerometer | Freescale MMA8653FCR1 |
| Magnetometer | Freescale MAG3110FCR1 |
| Hall effect sensor | TT Electronics OHS3150U |
| PAR light sensor | AMS-TAOS TCS34715FN with 700 nm low-pass filter |
# Filters
| Filter | Model |
|---|---|
| Visible detector band pass | Schott BG-18, 1 mm thickness |
| PAR sensor low pass | UQG Optics Hot Mirror HM-07 |
# Indicator Lights
Both versions have a charging indicator next to the micro-USB port and a progress/action indicator on top. MultispeQ v2.5 uses the updated NeoPixel component noted above.
# Battery
The instrument uses a rechargeable 3.7 V, 5500 mAh protected Li-ion battery that charges through the micro-USB port.
# Quality Control
The current Android and desktop applications provide two local QC workflows:
- Device QC checks communication, firmware, battery, sensors, calibration memory, and LED/detector responses before field work.
- Field QC runs three representative leaf measurements using the cached Photosynthesis RIDES 2.1 Protocol and provides trace review.
QC results are stored for the connected instrument. A passing QC check supports instrument readiness but does not replace correct sampling, Protocol selection, calibration, or scientific review of collected data.
# Firmware and Compatibility
Keep the instrument firmware and PhotosynQ application current. Before updating firmware, create a device-memory backup and restore it after the update when required. See Firmware Updates and Backups.
# References
Kuhlgert, S., Austic, G., Zegarac, R., Osei-Bonsu, I., Hoh, D., Chilvers, M. I., et al. (2016). MultispeQ Beta: a tool for large-scale plant phenotyping connected to the open PhotosynQ network. R. Soc. Open Sci. 3, 160592. doi:10.1098/rsos.160592 (opens new window).
Product Information
See the official MultispeQ product page (opens new window) for current product information and availability.