# Using the MultispeQ
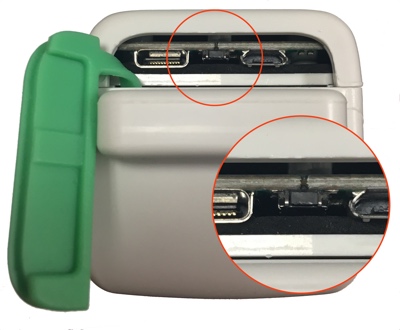
Before you start using the MultispeQ, make sure the Instrument is fully charged. Charge it by lifting the green protective cover on the back of the instrument and plug the provided cord into the Micro-USB port on the right. Use a power supply with at least 500mA output and charge for about 8 hours before taking your first measurements.
# Create an Account
To have access to all the measurement Protocols that are shared by the community and using the platform to save measurements and create your protocols, you will need an account. Go to https://photosynq.org (opens new window) and you will be directed to the sign in page. Select Sign Up and follow the instructions to create an account. More details on how to set up the account and how to use your account you can find in the Chapter Create an Account.
# Install an Application
To use and operate the MultispeQ an application is needed. PhotosynQ is providing applications for Android devices as well as for Windows and Mac. Go to the PhotosynQ Software Page (opens new window) and download the application for your system. Once you have installed the application, start the application and sign in using the email and password from your account. Since it is the fist time you start the application it will take some time to synchronize all the protocols and necessary information with the PhotosynQ platform. More information on the applications you can find in the Chapters Mobile Application and Desktop Application.
# Turn the Instrument on/off
# Turn on Instrument
Turn on your MultispeQ by pressing the center of the green protective cover on the back of the instrument for at least 5 seconds. If you have a MultispeQ v2.0, you should see top indicator light flashing once you release the button, indicating it has booted and is ready to be connected. After that the light will flash about every 10 seconds as long as the instrument is on indicating the battery level by color (green - full, yellow - medium, red - low).
# Turn off Instrument
Your MultispeQ should automatically turn off after 30 minutes. You can adjust the time in the Settings of the desktop application. If you are using a USB connection, you can keep the instrument running (always on) until the USB connector gets unplugged.
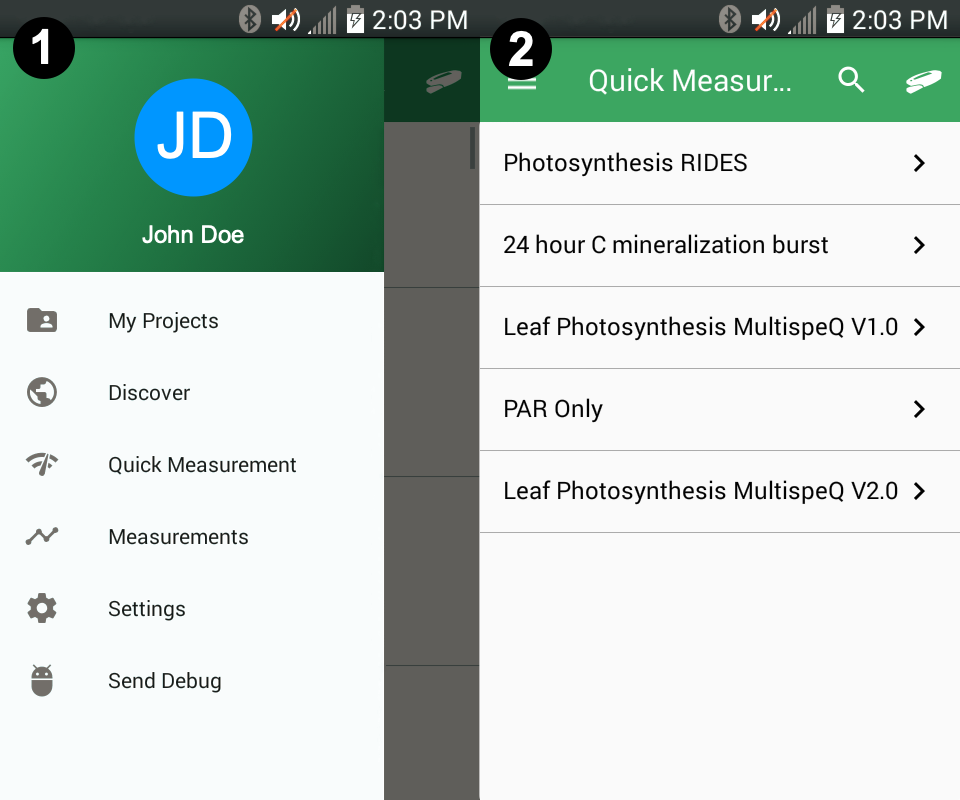
If you would like to turn your instrument off manually, you can do so through the mobile or desktop apps. In the mobile app, click the MultispeQ icon on the top of the page. Here you should see your connected instrument and a slider to turn off your MultispeQ. Slide that bar to the left to turn off and disconnect your MultispeQ.
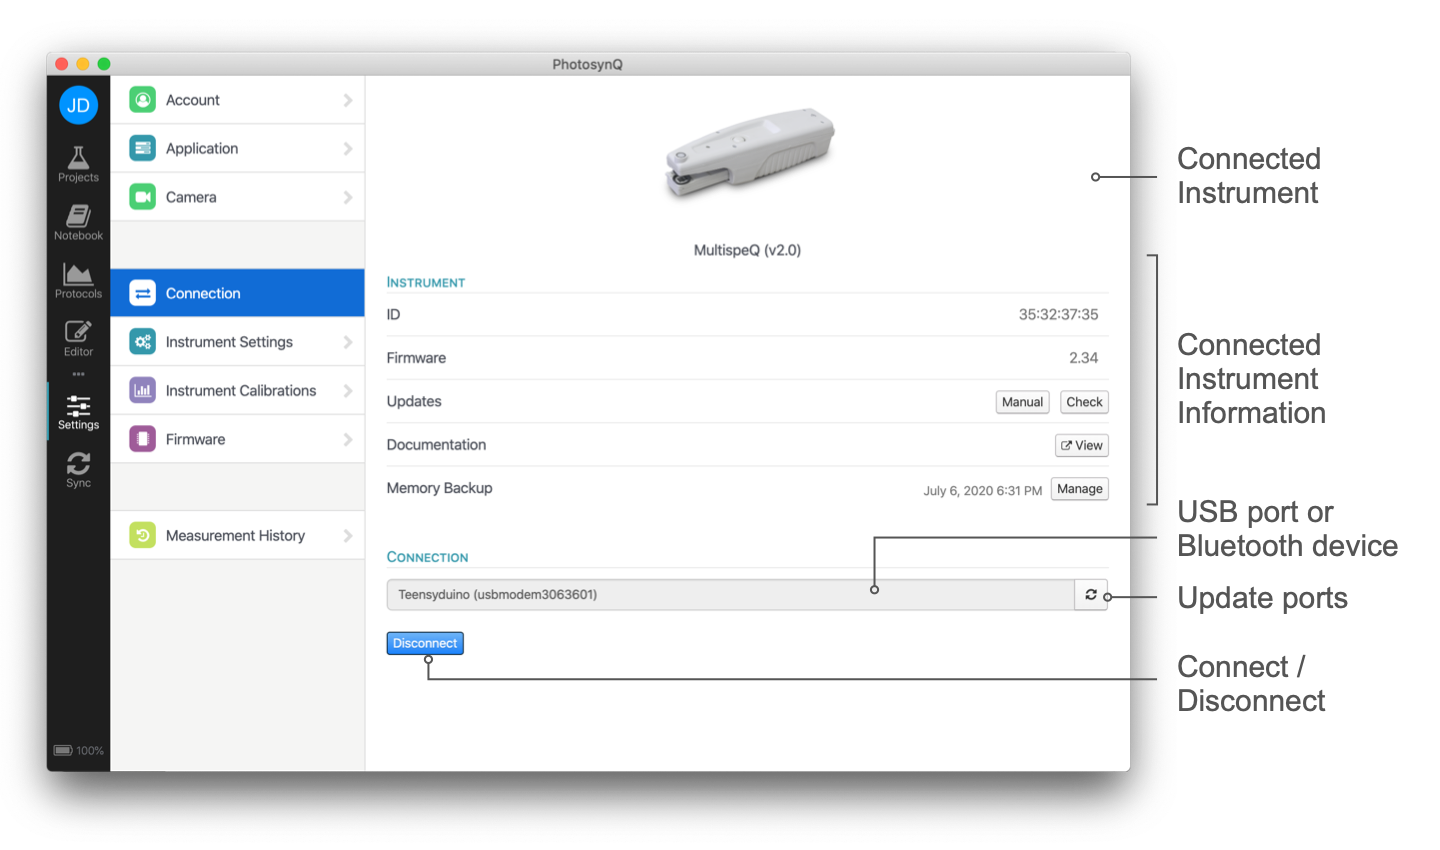
In the desktop app, navigate your way to the Settings tab on the left hand side of the window, then click on the Instrument Settings tab. Under the Power Management section, you will see an option labelled Power. Click the off button next to this option to immediately turn off your MultispeQ.
# Connect the Instrument
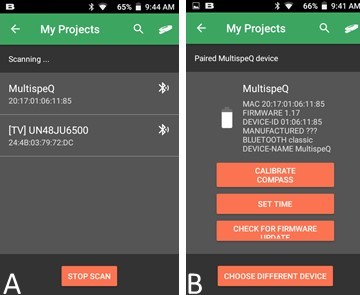
You can use Bluetooth or USB to connect your Instrument with your device. Depending on the Instrument and device, some connection options may not be available.
More details on this can be found in the Chapters Connect an Instrument - Desktop Application and Connect an Instrument - Mobile Application.
Make sure the instrument is charged and turned on before you continue to connect your instrument.
# Taking a Measurement
Now that the Instrument is connected to the application the first measurement can be taken. For this demonstration, the MultispeQ is used to measure the ambient light intensity using the Protocol named PAR only, no plant or leaf is needed. The second measurement determines the Photosystem II quantum Efficiency.
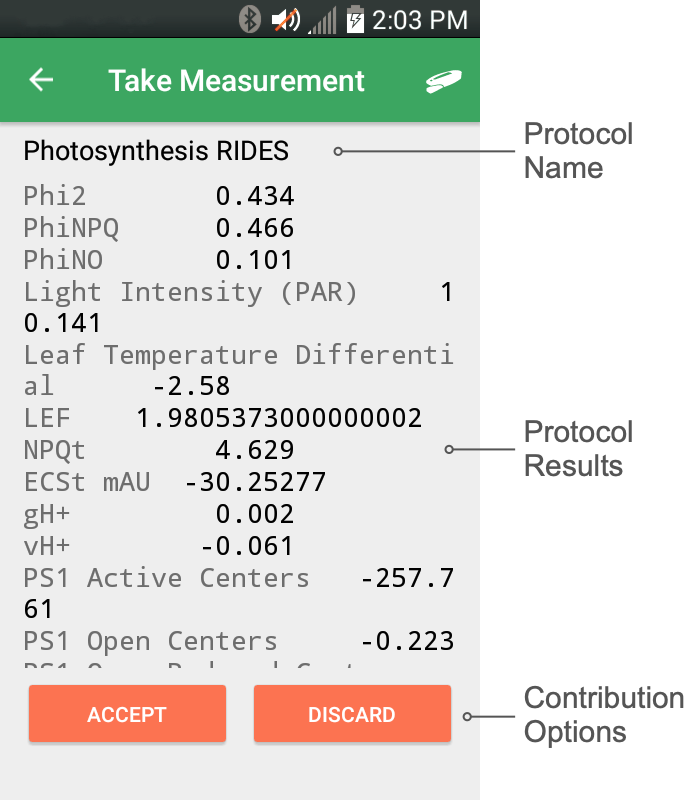
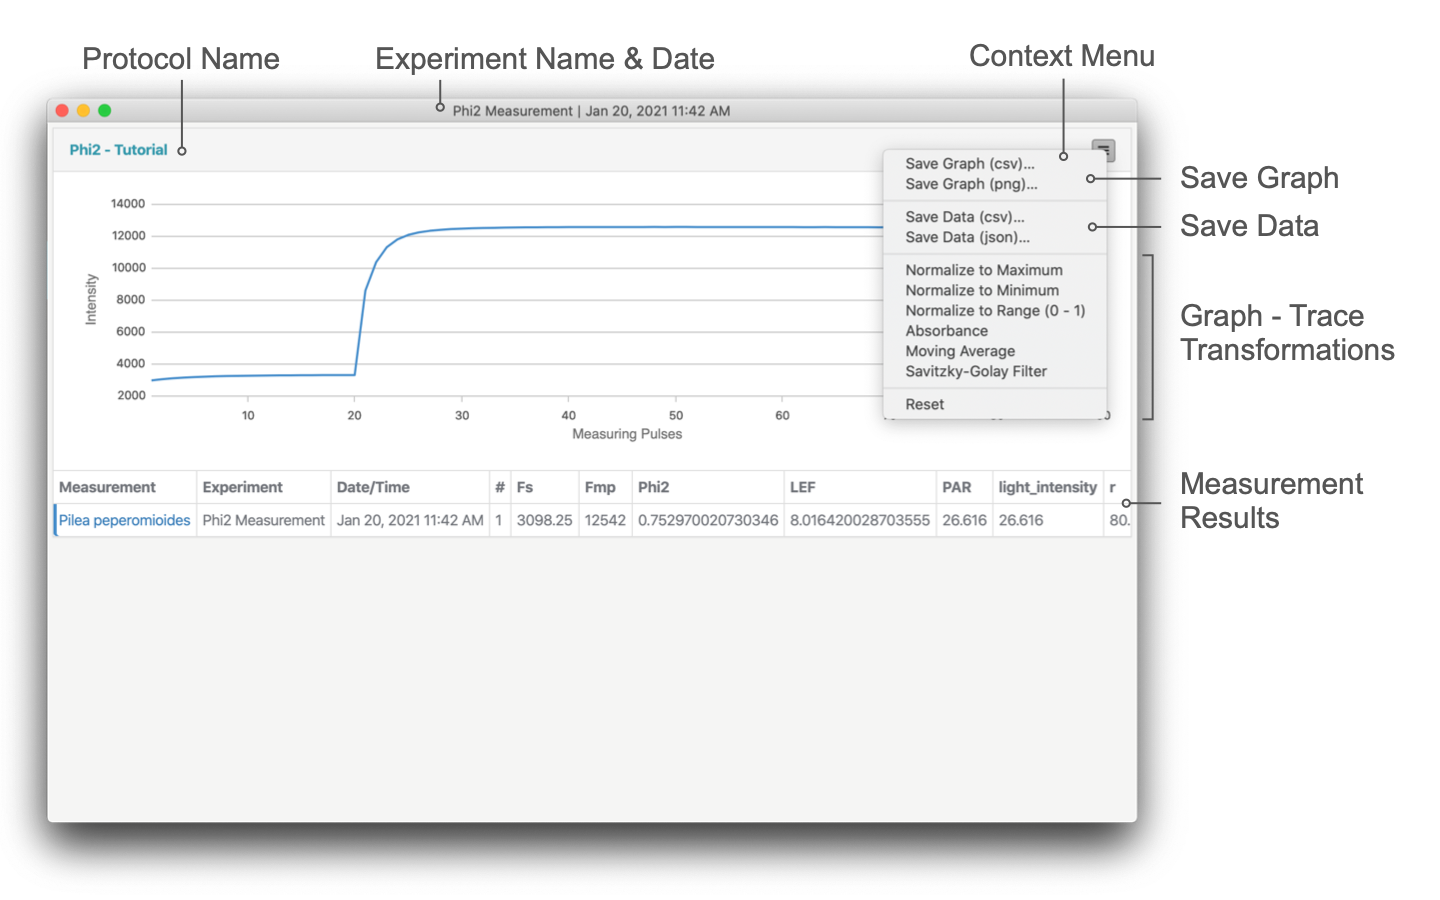
# Storing Measurement Results
In general, there are two options available to save measurement results, Projects and the Notebook (the third is a classic pen and paper, but we ignore that for now). In the mobile application, only Projects can be used to save data, in the desktop application, also the Notebook is available.
| Project | Notebook |
|---|---|
| Projects are best for large data collections and collaborations. The collected data is save in the cloud and easily sharable. Further, it can be viewed and analyzed online and packages for Python and R are available. | The notebook is great for a quick small set of measurements, or protocols that run for a long time and produce a large dataset. Further, it is intended to be used when developing new protocols. |