# Macros
Macros are used to calculate parameters from a measurement. To work with Macros you have to select Protocols from the left side bar, or you can select View → Protocols from the top menu bar or you can use the shortcut Ctrl/⌘+3.
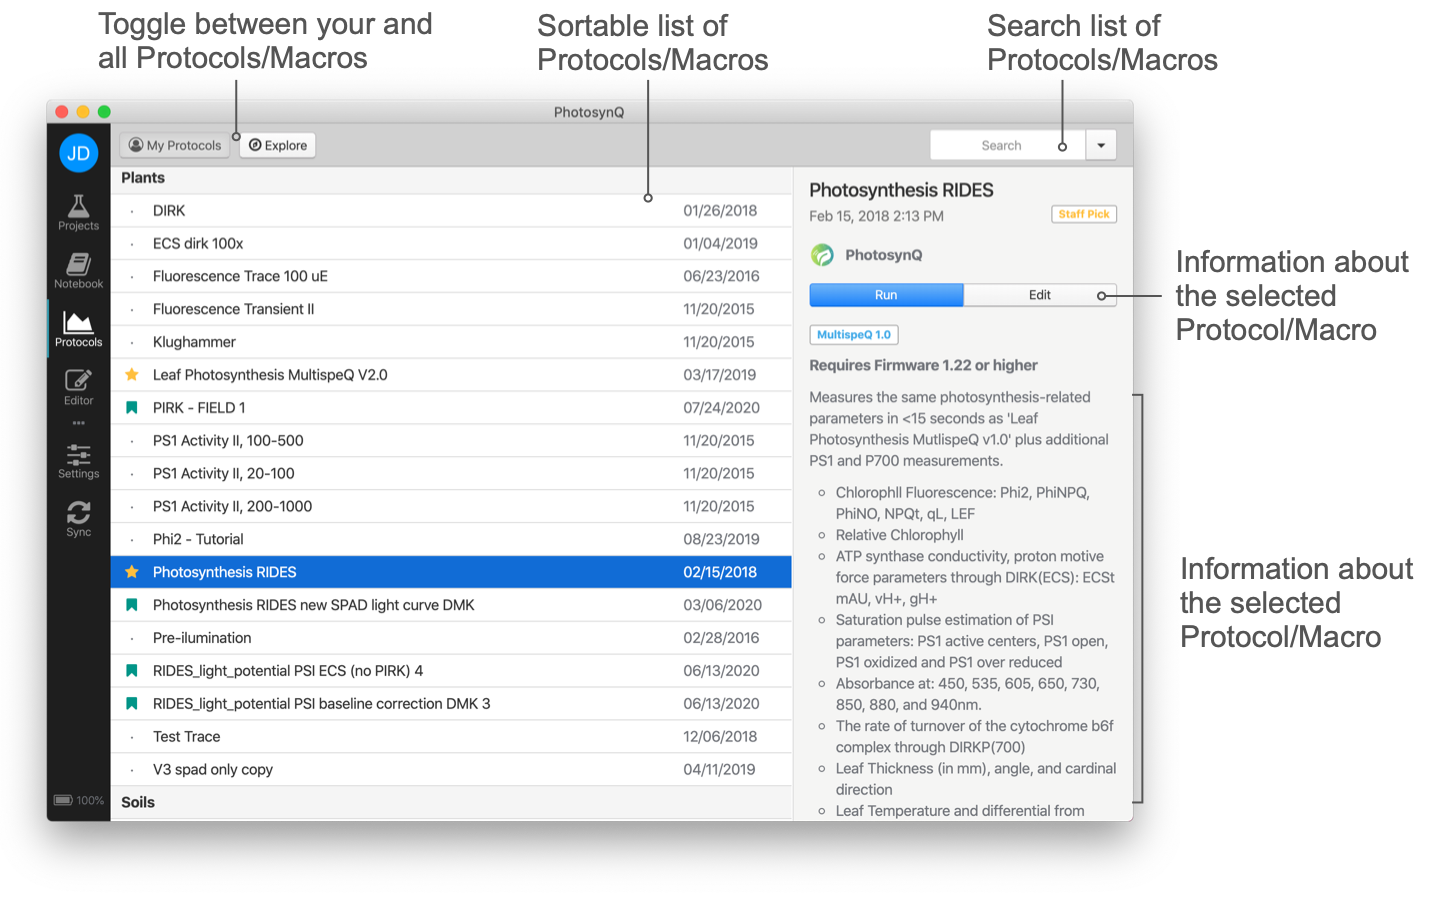
My Protocols shows a list of Protocols with Macros you have created. Explore will provide a list of all Protocols with Macros currently available on the Platform. Click on the list headers to sort the list of Protocols by name, creator, and date.
A single click on a Protocol from the list will bring up details about the Protocol in the right side bar. Here you can also see the discussion around the Protocol/Macro as well as add new comments. A double click will run the Protocol. To open the Macro, click on the Edit button in the side bar and then select Macro Code from the top Menu.
Select the search field in the top right corner Ctrl/⌘+F to enter a search query followed by the enter key to search the list of Protocols with Macros. Use the button inside the input field or the Esc key to reset the search.
# Create a new Macro
Marcos are part of a measurement Protocol. You can only create a new Macro as part of a Protocol by opening the Protocol editor selecting File → New Protocol... from the main menu. The Protocol and Macro template will be automatically added to your Protocol Editor and you are ask to pick a measurement from your Notebook to use as your measurement template. You can select that measurement at any time by selecting Measurement from the Menu Bar, or you can run the Protocol from the Editor and add the measurement to the Editor when the measurement is done.
# Editing an existing Macro
You can edit a Macro simply by selecting the Protocol that the Macro is attached to by selecting the Protocol from the list of Protocols and open the Editor by clicking on the Edit button on the side bar.