# CaliQ Calibration
Before getting started with the calibration, make sure you followed all the steps listed in the Overview and you have an external PAR sensor at hand.
External PAR Sensor Required!
If you don't have an external PAR sensor at hand, you are not able to recalibrate the CaliQ at this point.
# External PAR sensor
In order to calibrate the CaliQ you will require an additional external PAR sensor (not included with the CaliQ). Possible sensors would be the LI-COR® LI-190R, the Walz GmbH MQS-B, or a similar cosine corrected light probe. The MultispeQ PAR sensor can not be used as an external PAR sensor.
# Calibration Routine
Open the Desktop Application, connect the MultispeQ to your computer and then establish a connection to the Desktop Application. In this case a USB connection is preferred over Bluetooth.
# Start Calibration Protocol
The Protocol to run the calibration can be accessed in two ways, by navigating to the Instrument Calibrations under Settings or selecting the Protocol from the list of protocols directly. In any case the instructions on how to proceed after the calibration protocol is started, are the same.
# Instrument Calibrations
Select Settings from the side menu on the left. Then select Instrument Calibrations. Scroll down and select the Start button to Recalibrate CaliQ.
# Protocol List
Select Protocols from the side menu on the left. Then select Explore from the menu above the Protocol list and find the Protocol called CALIQ CALIBRATION #1: Manually calibrate the CaliQ PAR sensor using External PAR with CaliQ LEDs (ONLY IF CALIQ NEEDS CALIBRATION) and select Run from the side bar.
# Protocol Steps
# Step 1
The Protocol will prompt you to “attach CaliQ device to the MultispeQ. Be sure to place connector in correct orientation”. Attach the CaliQ to the instrument using a USB-C cable. Select OK to continue.
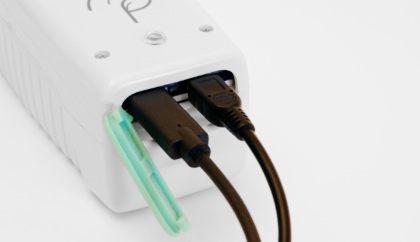
Test CaliQ Connection
In case you have problems with the cable orientation, please follow the instructions on how to test the connection before starting the calibration protocol.
# Step 2
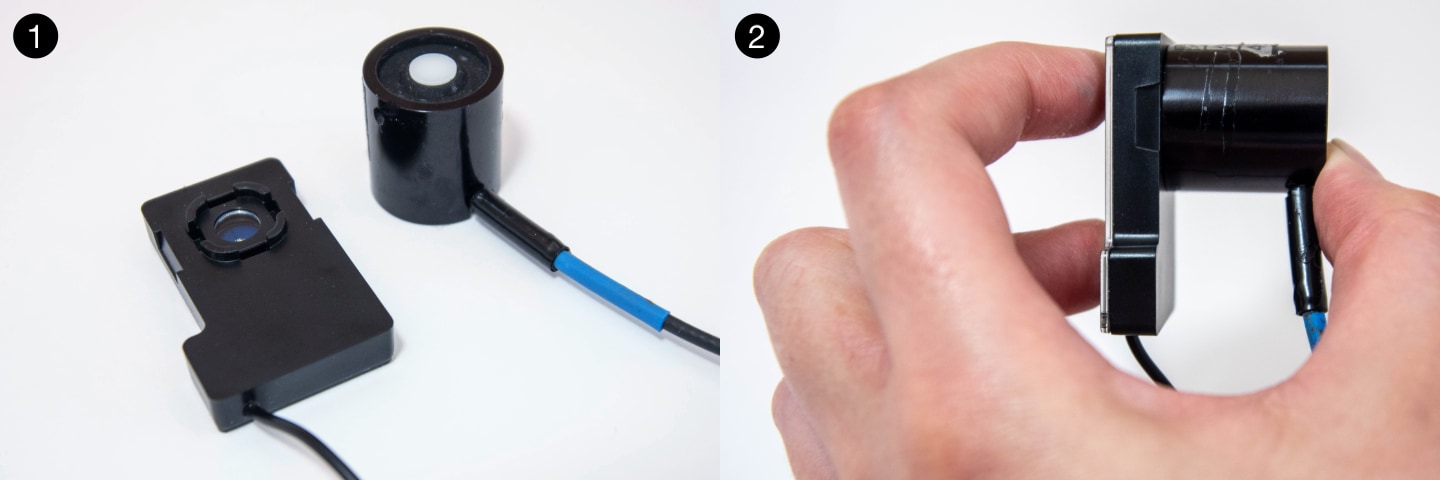
Next you will be prompted to “Attach CaliQ LED light source to external PAR sensor. Allow to settle. ENTER VALUE INTO BOX”. Press the external PAR sensor to the CaliQ LED Housing, and enter the value read by the PAR sensor into the prompt. Wait a little for the value to settle.
Click OK to continue (in the picture a LI-COR® LI-190R was used, but any similar cosine corrected PAR sensor will work).
# Step 3
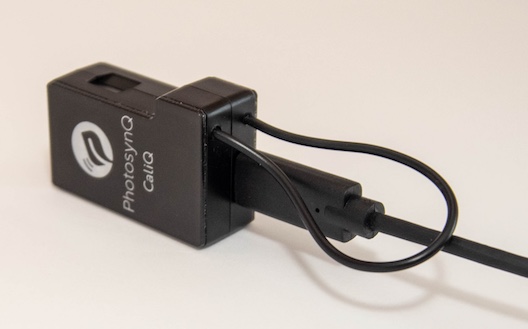
Last the Protocol will prompt you to “attach CaliQ LED light source to CaliQ PAR sensor”. Take the CaliQ PAR Sensor and attach it to the CaliQ Light Source. Then, click OK to continue.
# Save Calibrations
Save the calibration results to the instrument by selecting the Save to Instrument button from the menu above the results. Confirm the popup dialog by selecting the OK button. The data shown in the dialog are the results and commands to save the calibrations.